> ## Documentation Index
> Fetch the complete documentation index at: https://docs.oculusproxies.com/llms.txt
> Use this file to discover all available pages before exploring further.
# How to Set Up Oculus Proxies with BitBrowser
> Enhance your multi-account management by integrating BitBrowser with Oculus Proxies. This setup ensures a secure, efficient, and undetectable online presence—perfect for e-commerce, social media, and affiliate marketing.
 ## What is BitBrowser?
**BitBrowser** is an anti-detect browser designed to help users manage multiple online accounts while maintaining anonymity. It creates **isolated browser environments**, ensuring that each profile remains independent and undetectable.
It is widely used for:
* **E-commerce:** Manage multiple storefronts across different platforms.
* **Social Media Management:** Handle multiple accounts without the risk of detection.
* **Affiliate Marketing:** Run campaigns securely without linking accounts.
If you're using **Oculus** to access search engines like **Google, Bing, or Yandex** and facing connection issues, your proxy type may need adjustment. **ISP Premium Proxies** provide stable and unrestricted access, preventing blocks that standard proxies might encounter. Switching to **ISP Premium Proxies** can improve performance.
## How to Integrate Oculus Proxies with BitBrowser
1\. Download **BitBrowser** from the official website: [bitbrowser.net](https://www.bitbrowser.net/).
2\. Install the application on your device.
3\. Open **BitBrowser** and log in to your account.
If you don’t have an account, register on the BitBrowser website before proceeding.
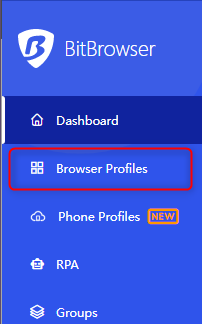
1\. On the home screen, click on the **Browser Profiles** tab.
2\. This section allows you to create and manage browser profiles.
## What is BitBrowser?
**BitBrowser** is an anti-detect browser designed to help users manage multiple online accounts while maintaining anonymity. It creates **isolated browser environments**, ensuring that each profile remains independent and undetectable.
It is widely used for:
* **E-commerce:** Manage multiple storefronts across different platforms.
* **Social Media Management:** Handle multiple accounts without the risk of detection.
* **Affiliate Marketing:** Run campaigns securely without linking accounts.
If you're using **Oculus** to access search engines like **Google, Bing, or Yandex** and facing connection issues, your proxy type may need adjustment. **ISP Premium Proxies** provide stable and unrestricted access, preventing blocks that standard proxies might encounter. Switching to **ISP Premium Proxies** can improve performance.
## How to Integrate Oculus Proxies with BitBrowser
1\. Download **BitBrowser** from the official website: [bitbrowser.net](https://www.bitbrowser.net/).
2\. Install the application on your device.
3\. Open **BitBrowser** and log in to your account.
If you don’t have an account, register on the BitBrowser website before proceeding.
1\. On the home screen, click on the **Browser Profiles** tab.
2\. This section allows you to create and manage browser profiles.
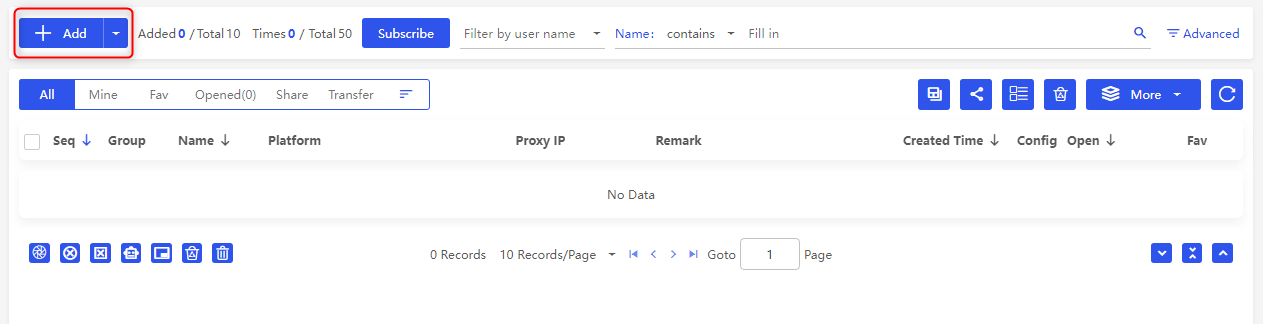
 1\. Click the **+ Add** button to create a new browser profile.
2\. Customize the profile settings according to your needs.
1\. Click the **+ Add** button to create a new browser profile.
2\. Customize the profile settings according to your needs.
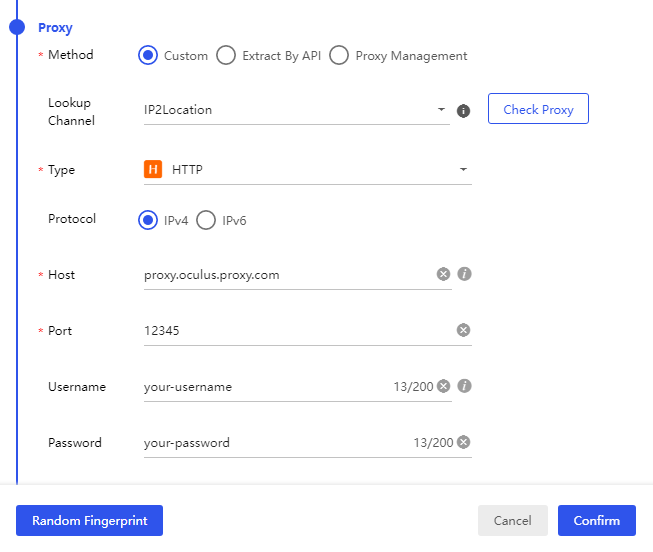
 1\. Scroll down to the **Proxy** section in the profile settings.
2\. Enter your **Oculus Proxy** details:
* **Type:** Select `HTTP`, `HTTPS`, or `SOCKS5`.
* **Host:** `proxy.oculus-proxy.com`
* **Port:** Use the port number from your [Oculus dashboard](https://oculusproxies.com/dashboard/page/plans).
* **Username:** Your **Oculus proxy username**.
* **Password:** Your **Oculus proxy password**.
1\. Scroll down to the **Proxy** section in the profile settings.
2\. Enter your **Oculus Proxy** details:
* **Type:** Select `HTTP`, `HTTPS`, or `SOCKS5`.
* **Host:** `proxy.oculus-proxy.com`
* **Port:** Use the port number from your [Oculus dashboard](https://oculusproxies.com/dashboard/page/plans).
* **Username:** Your **Oculus proxy username**.
* **Password:** Your **Oculus proxy password**.
 **Need a location-specific proxy?** Use `your-username-country-US` to connect to a U.S. exit node. Replace `US` with the desired country code.
1\. Click the **Check Proxy** button to verify the connection.
2\. If the connection is successful, click **Confirm** to save the settings.
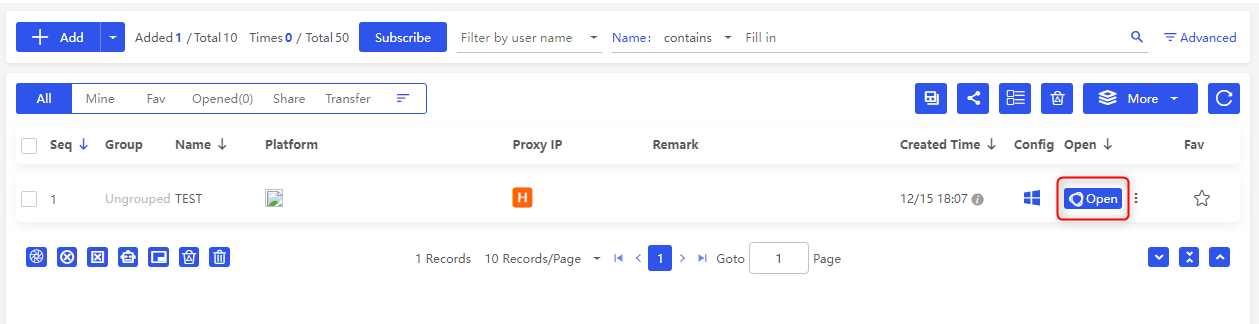
1\. After saving the profile, click **Open** to launch the browser with your configured proxy settings.
2\. Visit an IP-checking website (e.g., [ipinfo.io](https://ipinfo.io)) to confirm that your proxy is active.
**Need a location-specific proxy?** Use `your-username-country-US` to connect to a U.S. exit node. Replace `US` with the desired country code.
1\. Click the **Check Proxy** button to verify the connection.
2\. If the connection is successful, click **Confirm** to save the settings.
1\. After saving the profile, click **Open** to launch the browser with your configured proxy settings.
2\. Visit an IP-checking website (e.g., [ipinfo.io](https://ipinfo.io)) to confirm that your proxy is active.
 **Congratulations!** You’ve successfully integrated **Oculus Proxies** with **BitBrowser**. Now you can securely manage multiple accounts, access geo-restricted content, and reduce the risk of detection and bans. 🚀