> ## Documentation Index
> Fetch the complete documentation index at: https://docs.oculusproxies.com/llms.txt
> Use this file to discover all available pages before exploring further.
# How to Set Up Oculus Proxies with Brave Browser
> By using Brave with a proxy, you can mask your real IP address, bypass geo-restrictions, and prevent websites from tracking your online activity. This guide will walk you through the steps to set up Oculus Proxies in Brave, helping you stay secure and undetected online.
 ## What is Brave Browser?
**Brave Browser** is a privacy-focused web browser that stands out with its Shields feature—offering built-in protection against ads, trackers, fingerprinting, cookies, and more. Shields work by default, ensuring a secure browsing experience while allowing users to customize settings as needed. By combining **Brave Browser with Oculus Proxies**, you can further enhance your privacy, bypass geo-restrictions, and maintain anonymity while browsing the web. This powerful combination ensures a secure, ad-free, and unrestricted internet experience.
If you're using **Oculus** to access search engines like **Google, Bing, or Yandex** and facing connection issues, the proxy type could be the issue. **ISP Premium Proxies** ensure stable and unrestricted access, preventing blocks that standard proxies might encounter. Switching to **ISP Premium Proxies** can help maintain smooth and reliable performance.
## How to Integrate Oculus Proxies with Brave Browser
[Install Brave Browser](https://brave.com/) on your device.
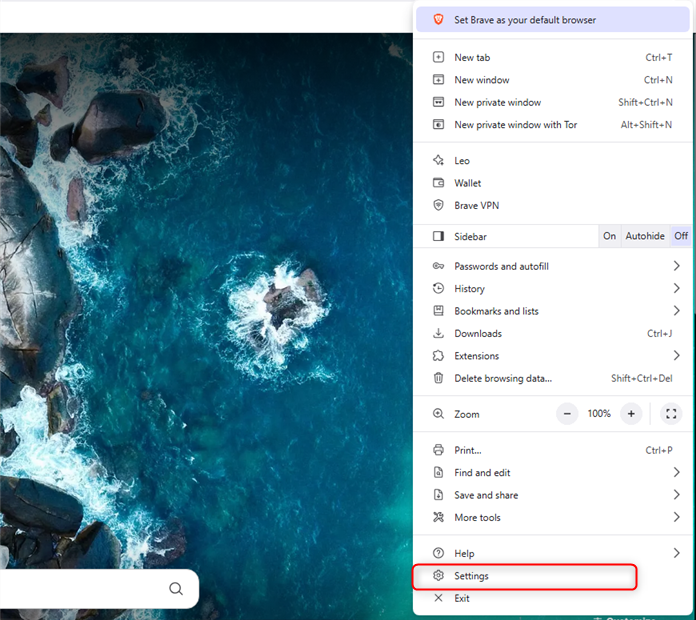
Open Brave and navigate to the browser’s **Settings**.
## What is Brave Browser?
**Brave Browser** is a privacy-focused web browser that stands out with its Shields feature—offering built-in protection against ads, trackers, fingerprinting, cookies, and more. Shields work by default, ensuring a secure browsing experience while allowing users to customize settings as needed. By combining **Brave Browser with Oculus Proxies**, you can further enhance your privacy, bypass geo-restrictions, and maintain anonymity while browsing the web. This powerful combination ensures a secure, ad-free, and unrestricted internet experience.
If you're using **Oculus** to access search engines like **Google, Bing, or Yandex** and facing connection issues, the proxy type could be the issue. **ISP Premium Proxies** ensure stable and unrestricted access, preventing blocks that standard proxies might encounter. Switching to **ISP Premium Proxies** can help maintain smooth and reliable performance.
## How to Integrate Oculus Proxies with Brave Browser
[Install Brave Browser](https://brave.com/) on your device.
Open Brave and navigate to the browser’s **Settings**.
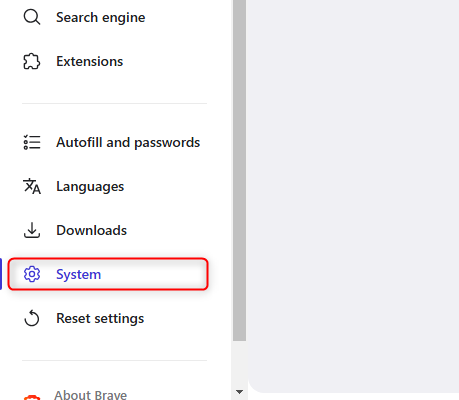
 In the left menu, select **System** settings.
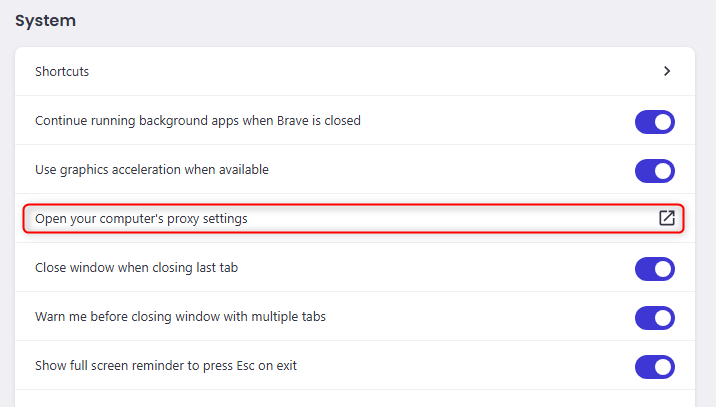
 Click **Open your computer’s proxy settings** to access system-level proxy configurations.
 Follow the step-by-step guide for Windows proxy configuration [here](https://docs.oculusproxies.com/integration-guides/windows).
Follow the step-by-step guide for macOS proxy configuration [here](https://docs.oculusproxies.com/integration-guides/macos).
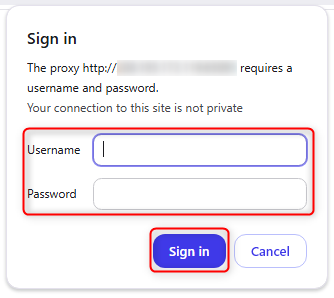
Return to Brave, and when prompted, enter your proxy `Username` and `Password`, then click **Sign in**.
Follow the step-by-step guide for Windows proxy configuration [here](https://docs.oculusproxies.com/integration-guides/windows).
Follow the step-by-step guide for macOS proxy configuration [here](https://docs.oculusproxies.com/integration-guides/macos).
Return to Brave, and when prompted, enter your proxy `Username` and `Password`, then click **Sign in**.