> ## Documentation Index
> Fetch the complete documentation index at: https://docs.oculusproxies.com/llms.txt
> Use this file to discover all available pages before exploring further.
# How to Set Up Oculus Proxies with ChangeDetection
> Enhance your website monitoring with Oculus Proxies and ChangeDetection. Follow this step-by-step guide to track website updates securely, privately, and without restrictions.
 ## What is ChangeDetection?
**ChangeDetection** is a powerful tool for tracking website updates in real time. Whether you're monitoring **competitor websites, price changes, product availability, or content updates**, ChangeDetection keeps you informed.
By integrating **Oculus Proxies**, you add an extra layer of privacy, avoid geo-restrictions, and manage multiple monitoring tasks without detection or IP blocks.
If you're using **Oculus** to access search engines like **Google, Bing, or Yandex** and experiencing connection issues, your proxy type may need adjustment. **ISP Premium Proxies** provide stable and unrestricted access, preventing blocks that standard proxies might encounter. Switching to **ISP Premium Proxies** can improve performance.
## How to Integrate Oculus Proxies With ChangeDetection
1\. Visit the [ChangeDetection website](https://changedetection.io/).
2\. Create an account if you don’t already have one.
3\. Log in to access the **ChangeDetection dashboard**.
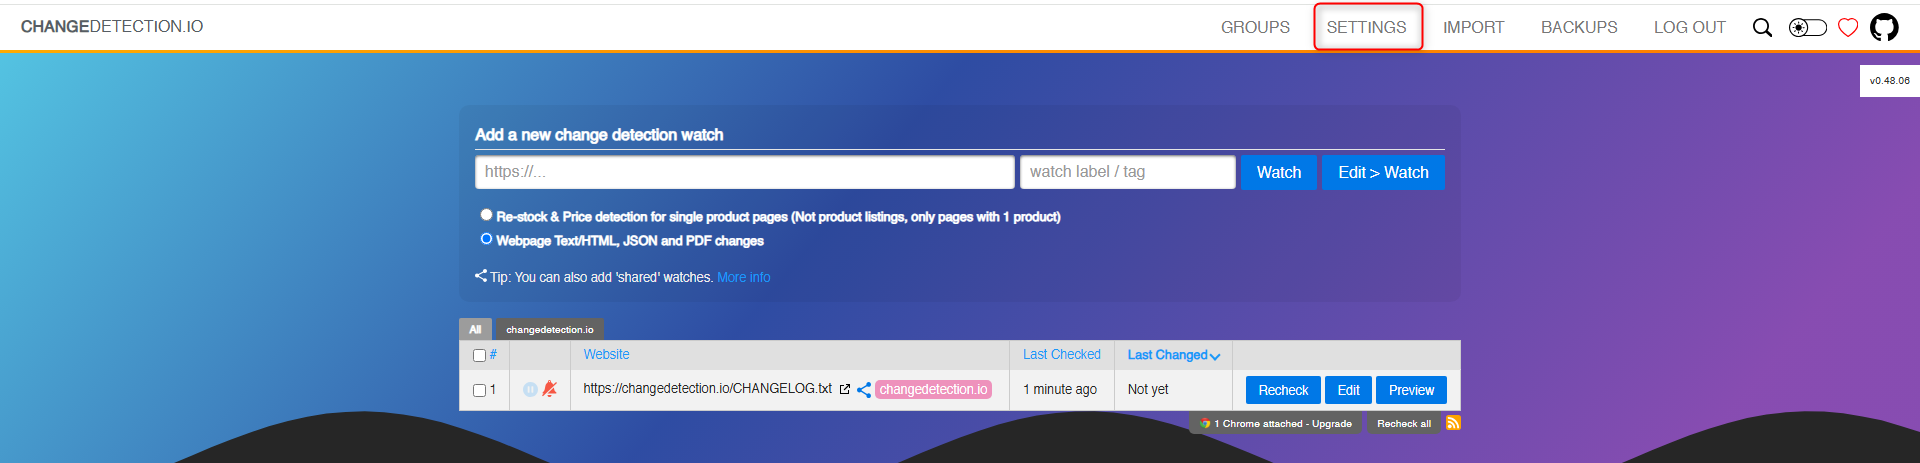
1\. In the dashboard, go to the **Settings** menu.
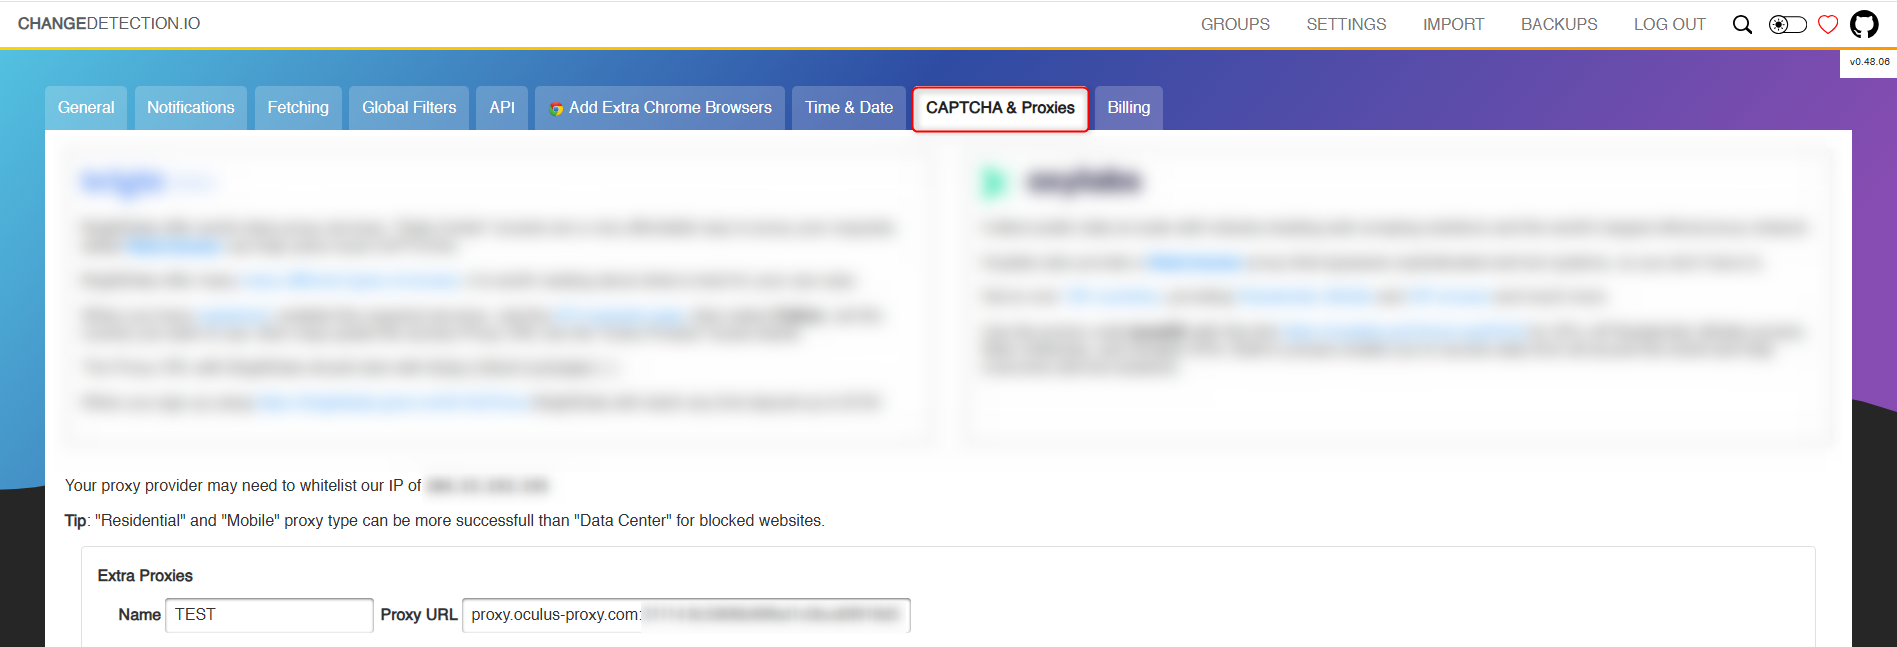
2\. Click on the **CAPTCHA & Proxies** tab to open the proxy settings.
## What is ChangeDetection?
**ChangeDetection** is a powerful tool for tracking website updates in real time. Whether you're monitoring **competitor websites, price changes, product availability, or content updates**, ChangeDetection keeps you informed.
By integrating **Oculus Proxies**, you add an extra layer of privacy, avoid geo-restrictions, and manage multiple monitoring tasks without detection or IP blocks.
If you're using **Oculus** to access search engines like **Google, Bing, or Yandex** and experiencing connection issues, your proxy type may need adjustment. **ISP Premium Proxies** provide stable and unrestricted access, preventing blocks that standard proxies might encounter. Switching to **ISP Premium Proxies** can improve performance.
## How to Integrate Oculus Proxies With ChangeDetection
1\. Visit the [ChangeDetection website](https://changedetection.io/).
2\. Create an account if you don’t already have one.
3\. Log in to access the **ChangeDetection dashboard**.
1\. In the dashboard, go to the **Settings** menu.
2\. Click on the **CAPTCHA & Proxies** tab to open the proxy settings.
 1\. In the **Proxy Configuration** section:
* **Name:** Enter a recognizable name for your proxy (e.g., "Oculus Proxy").
* **Proxy URL:** Input your proxy details in this format:
```
protocol://username:password@proxy.oculus-proxy.com:port
```
2\. Retrieve your proxy credentials from your [Oculus Dashboard](https://oculusproxies.com/dashboard/page/plans):
* Log in to your dashboard.
* Click on **Show Configured List** and copy the proxy details under the **Generic** tab.
3\. Paste the copied details into the **Proxy URL** field in **ChangeDetection**.
4\. Click **Save** to store the proxy configuration.
1\. In the **Proxy Configuration** section:
* **Name:** Enter a recognizable name for your proxy (e.g., "Oculus Proxy").
* **Proxy URL:** Input your proxy details in this format:
```
protocol://username:password@proxy.oculus-proxy.com:port
```
2\. Retrieve your proxy credentials from your [Oculus Dashboard](https://oculusproxies.com/dashboard/page/plans):
* Log in to your dashboard.
* Click on **Show Configured List** and copy the proxy details under the **Generic** tab.
3\. Paste the copied details into the **Proxy URL** field in **ChangeDetection**.
4\. Click **Save** to store the proxy configuration.
 **For geo-targeted proxies, add a country code to your username (e.g., `your-username-country-US` for a U.S.-based proxy).**
1\. Go back to the **General** settings tab.
2\. Locate the proxy selection section.
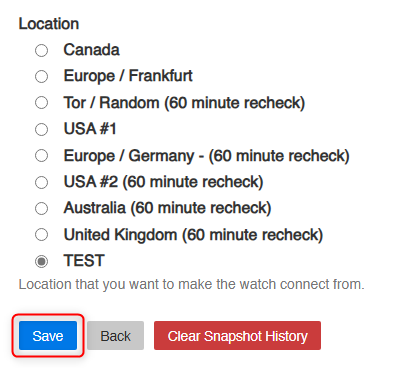
3\. Assign the newly added Oculus proxy to your monitoring tasks.
4\. Click **Save** to apply the changes.
**For geo-targeted proxies, add a country code to your username (e.g., `your-username-country-US` for a U.S.-based proxy).**
1\. Go back to the **General** settings tab.
2\. Locate the proxy selection section.
3\. Assign the newly added Oculus proxy to your monitoring tasks.
4\. Click **Save** to apply the changes.
 1\. Set up your monitoring tasks in **ChangeDetection** as usual.
2\. Your integrated **Oculus Proxy** will now ensure all requests are **secure, anonymous, and unrestricted**.
**Congratulations!** You’ve successfully integrated **Oculus Proxies** with **ChangeDetection**. Now you can track website updates with ease, privacy, and efficiency. 🚀
1\. Set up your monitoring tasks in **ChangeDetection** as usual.
2\. Your integrated **Oculus Proxy** will now ensure all requests are **secure, anonymous, and unrestricted**.
**Congratulations!** You’ve successfully integrated **Oculus Proxies** with **ChangeDetection**. Now you can track website updates with ease, privacy, and efficiency. 🚀