> ## Documentation Index
> Fetch the complete documentation index at: https://docs.oculusproxies.com/llms.txt
> Use this file to discover all available pages before exploring further.
# How to Set Up Oculus Proxies With Che Browser
> Safeguard your online identity and streamline your operations using Che Browser in combination with Oculus Proxies. This guide walks you through the process of setting up Oculus Proxies within Che Browser to enable secure management of multiple accounts.
 ## What is Che Browser?
**Che** Browser is a dedicated anti-detect solution that modifies both browser and hardware fingerprints on Windows systems. It enables you to run multiple browser profiles simultaneously, with each one appearing as a distinct device to websites. Incorporating **Oculus Proxies** boosts your privacy, simplifies proxy configuration, and provides consistent, location-specific connectivity across all sessions.
If you're using **Oculus** to access search engines like **Google, Bing, or Yandex** and facing connection issues, your proxy type may need adjustment. **ISP Premium Proxies** provide stable and unrestricted access, preventing blocks that standard proxies might encounter. Switching to **ISP Premium Proxies** can improve performance.
Che Browser exclusively with the SOCKS5 protocol, and requires the use of port 31115
## How to Integrate Oculus Proxies With Che Browser
Start by [downloading and installing](https://chebrowser.site/) the most recent version of Che Browser on your computer.
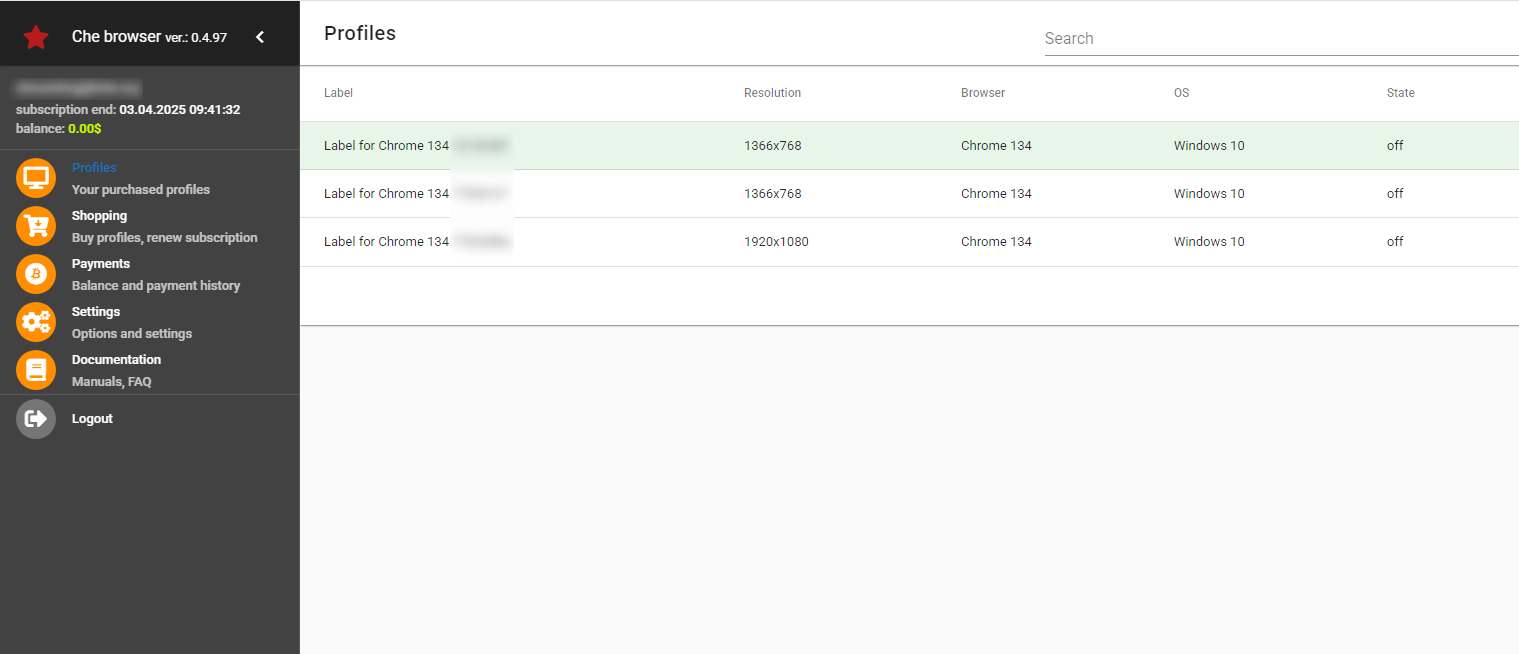
Go to the **Profiles section** and choose the profile you wish to set up.
## What is Che Browser?
**Che** Browser is a dedicated anti-detect solution that modifies both browser and hardware fingerprints on Windows systems. It enables you to run multiple browser profiles simultaneously, with each one appearing as a distinct device to websites. Incorporating **Oculus Proxies** boosts your privacy, simplifies proxy configuration, and provides consistent, location-specific connectivity across all sessions.
If you're using **Oculus** to access search engines like **Google, Bing, or Yandex** and facing connection issues, your proxy type may need adjustment. **ISP Premium Proxies** provide stable and unrestricted access, preventing blocks that standard proxies might encounter. Switching to **ISP Premium Proxies** can improve performance.
Che Browser exclusively with the SOCKS5 protocol, and requires the use of port 31115
## How to Integrate Oculus Proxies With Che Browser
Start by [downloading and installing](https://chebrowser.site/) the most recent version of Che Browser on your computer.
Go to the **Profiles section** and choose the profile you wish to set up.
 Within the profile configuration, enable the option labeled **Connection:direct**.
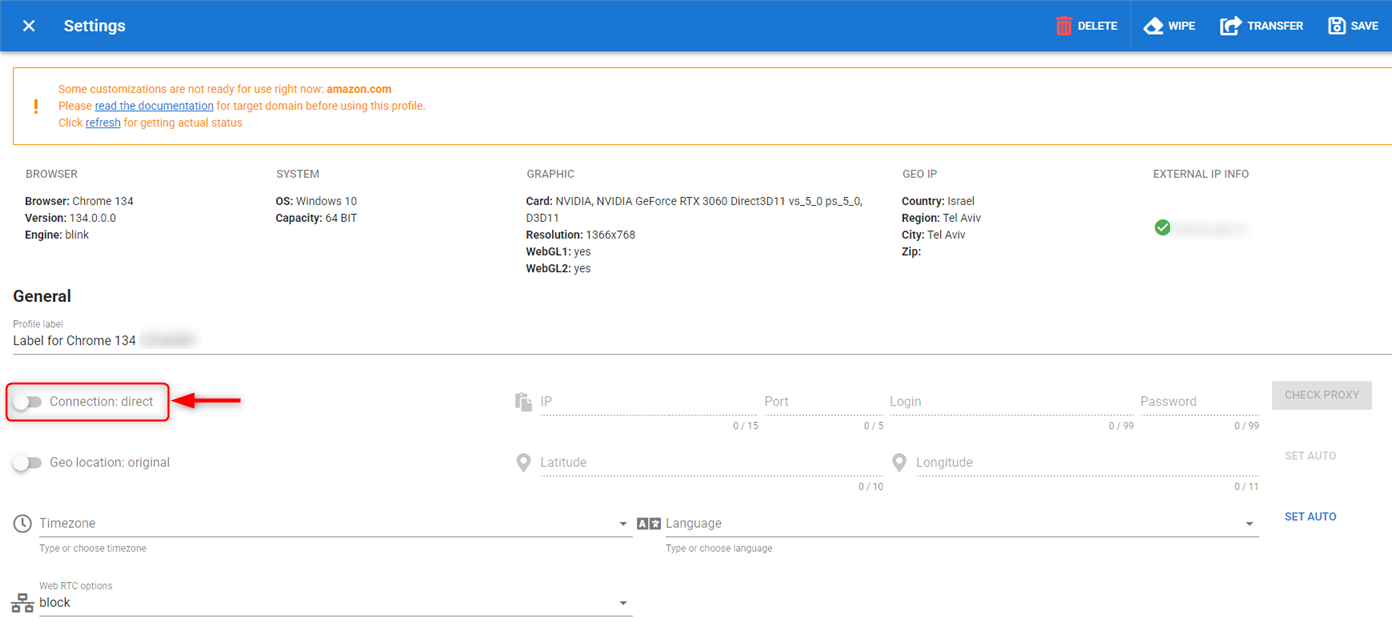 Since Che Browser **only accepts SOCKS5**, make sure to enter **port 31115**. Provide your proxy details including: `Host`, `Port`, `Username` and `Password`.
 Click on **CHECK PROXY** to confirm the connection — if successful, you’ll see the updated location appear above.
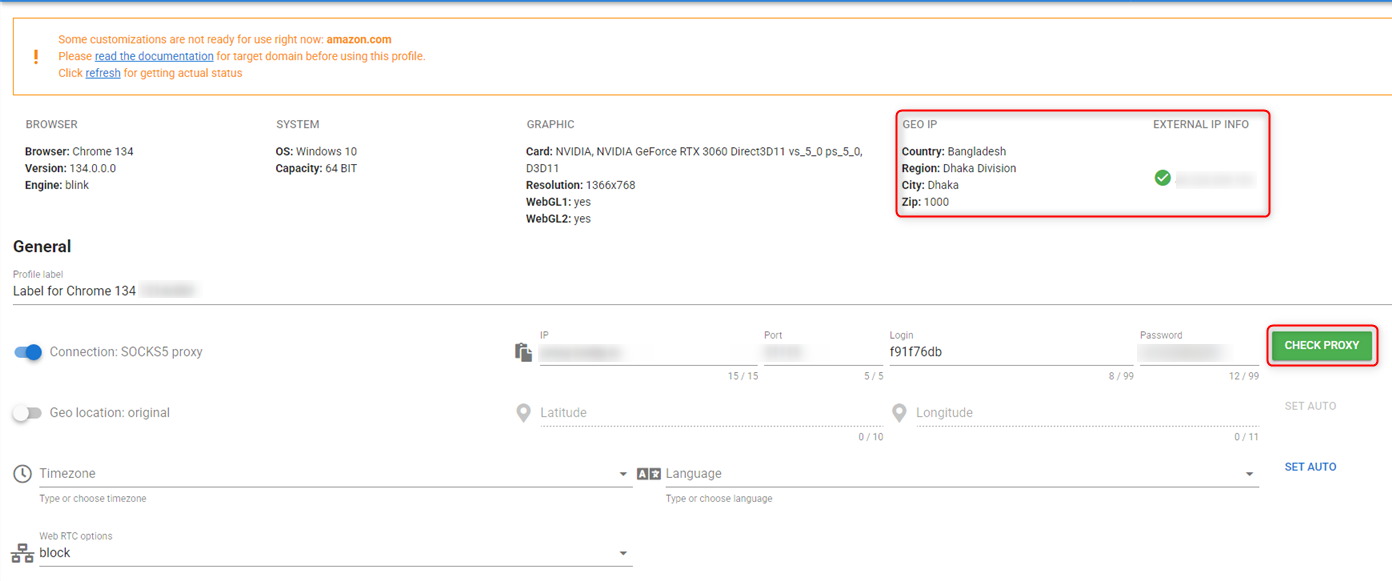 After the proxy has been verified, save your changes and open the browser profile to begin browsing securely.