> ## Documentation Index
> Fetch the complete documentation index at: https://docs.oculusproxies.com/llms.txt
> Use this file to discover all available pages before exploring further.
# How to Integrate Oculus Proxies With Datadog
> Monitor cloud applications and infrastructure effortlessly with Datadog Agent and Oculus Proxies. By integrating Oculus Proxies, you can track system performance, analyze real-time data, and maintain secure and private cloud monitoring.
 ## What is Datadog?
**Datadog** offers advanced monitoring solutions to help engineering teams efficiently manage cloud and hybrid environments. Its features include infrastructure monitoring, network performance analysis, serverless tracking, and cloud cost management, ensuring reliability, efficiency, and optimal performance. With **Oculus Proxies**, you can improve security, protect privacy, and monitor systems seamlessly across different platforms.
If you're using **Oculus** to access search engines like **Google, Bing, or Yandex** and facing connection issues, your proxy type may need adjustment. **ISP Premium Proxies** provide stable and unrestricted access, preventing blocks that standard proxies might encounter. Switching to **ISP Premium Proxies** can improve performance.
## How to Integrate Oculus Proxies With Datadog Agent
Visit the [Datadog website](https://app.datadoghq.eu/account/login?next=%2Fnetwork%2Fintro%3FredirectFrom%3Danalytics), sign up, and run the Agent Manager.
Once installed, open the **Agent Manager** and go to **Settings**.
## What is Datadog?
**Datadog** offers advanced monitoring solutions to help engineering teams efficiently manage cloud and hybrid environments. Its features include infrastructure monitoring, network performance analysis, serverless tracking, and cloud cost management, ensuring reliability, efficiency, and optimal performance. With **Oculus Proxies**, you can improve security, protect privacy, and monitor systems seamlessly across different platforms.
If you're using **Oculus** to access search engines like **Google, Bing, or Yandex** and facing connection issues, your proxy type may need adjustment. **ISP Premium Proxies** provide stable and unrestricted access, preventing blocks that standard proxies might encounter. Switching to **ISP Premium Proxies** can improve performance.
## How to Integrate Oculus Proxies With Datadog Agent
Visit the [Datadog website](https://app.datadoghq.eu/account/login?next=%2Fnetwork%2Fintro%3FredirectFrom%3Danalytics), sign up, and run the Agent Manager.
Once installed, open the **Agent Manager** and go to **Settings**.
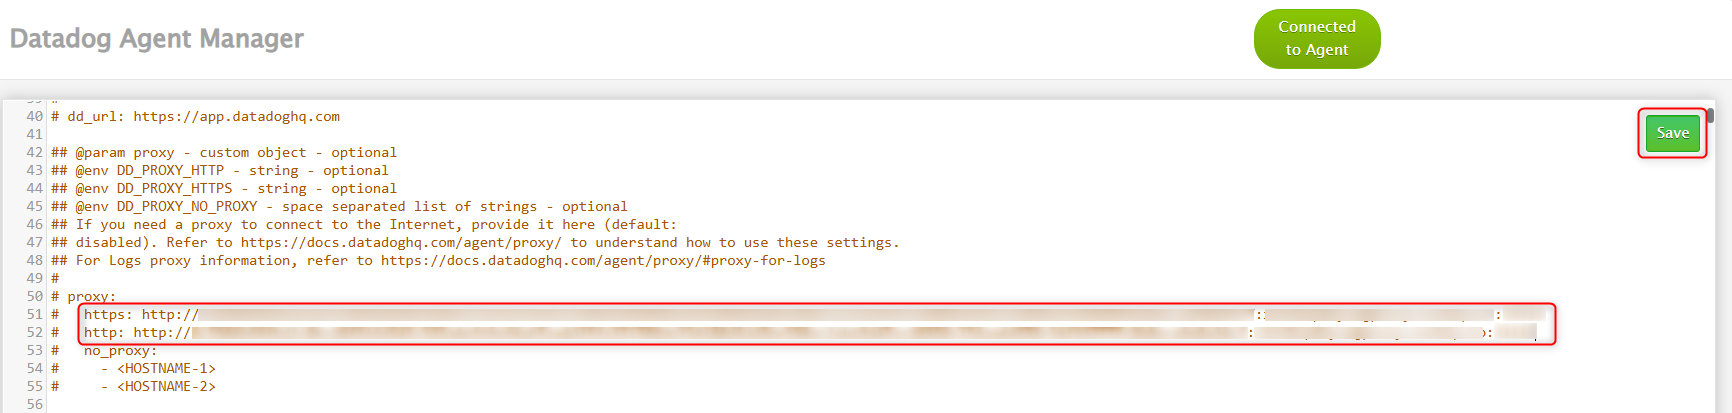
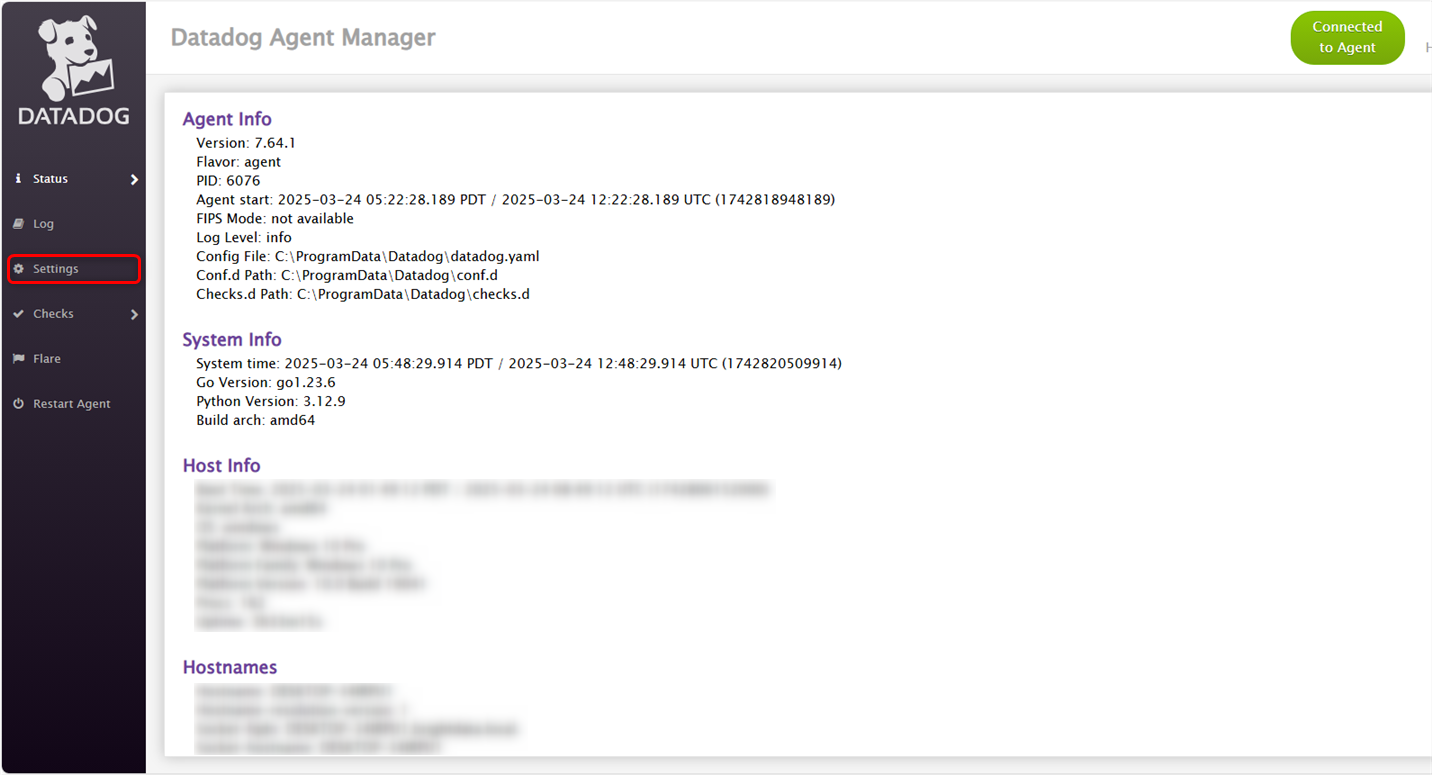 Locate the proxy section in the `datadog.yaml` configuration file.
 The Agent uses `https` to send data to Datadog, while integrations may use `http` for metric collection.
Replace ``, ``, ``, and `` with your proxy credentials, then click **Save**.
The Agent uses `https` to send data to Datadog, while integrations may use `http` for metric collection.
Replace ``, ``, ``, and `` with your proxy credentials, then click **Save**.
 Select **Restart Agent** from the left menu to apply the updated proxy settings.
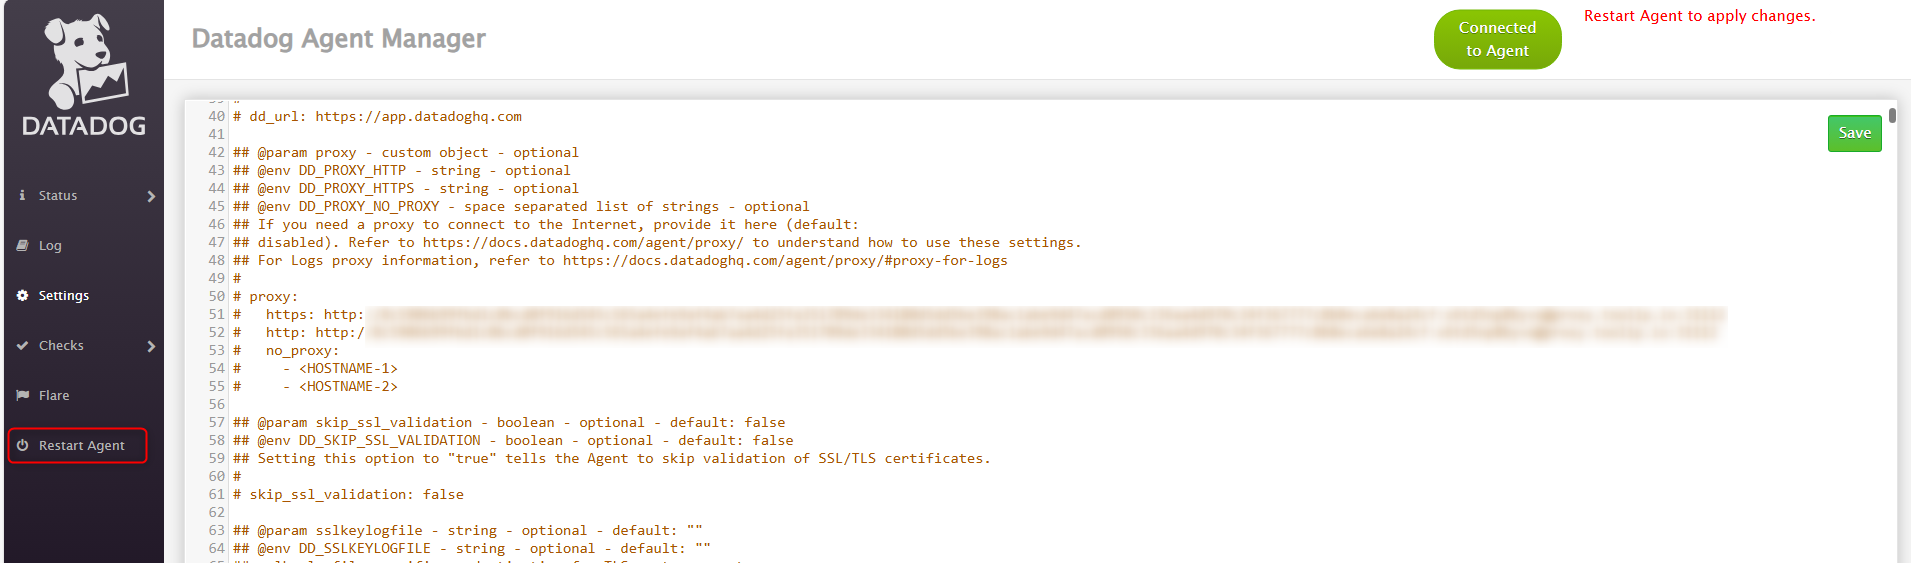 Your proxy configuration is now complete, and you’re ready to start using the agent.