> ## Documentation Index
> Fetch the complete documentation index at: https://docs.oculusproxies.com/llms.txt
> Use this file to discover all available pages before exploring further.
# How to Integrate Oculus Proxies With DICloak
> Optimize your workflow and simplify multi-account management by integrating Oculus Proxies with DICloak Browser. This guide will help you configure secure and reliable proxy connections for private, seamless browsing with enhanced anonymity and protection.
 ## What is DICloak?
**DICloak** is a powerful anti-detect browser designed for secure and anonymous browsing. With dynamic fingerprinting, profile management, and strong proxy support, it’s ideal for professionals prioritizing privacy and data security. Whether managing multiple accounts or automating tasks, DICloak offers a user-friendly interface with automatic login and multi-account management. Integrating **Oculus Proxies** further enhances privacy, security, and performance.
If you're using **Oculus** to access search engines like **Google, Bing, or Yandex** and facing connection issues, your proxy type may need adjustment. **ISP Premium Proxies** provide stable and unrestricted access, preventing blocks that standard proxies might encounter. Switching to **ISP Premium Proxies** can improve performance.
## How to Integrate Oculus Proxies With DICloak
Go to the [DICloak website](https://dicloak.com/download), download, and install the browser.
Open the browser and go to **IP Proxies** from the left menu.
## What is DICloak?
**DICloak** is a powerful anti-detect browser designed for secure and anonymous browsing. With dynamic fingerprinting, profile management, and strong proxy support, it’s ideal for professionals prioritizing privacy and data security. Whether managing multiple accounts or automating tasks, DICloak offers a user-friendly interface with automatic login and multi-account management. Integrating **Oculus Proxies** further enhances privacy, security, and performance.
If you're using **Oculus** to access search engines like **Google, Bing, or Yandex** and facing connection issues, your proxy type may need adjustment. **ISP Premium Proxies** provide stable and unrestricted access, preventing blocks that standard proxies might encounter. Switching to **ISP Premium Proxies** can improve performance.
## How to Integrate Oculus Proxies With DICloak
Go to the [DICloak website](https://dicloak.com/download), download, and install the browser.
Open the browser and go to **IP Proxies** from the left menu.
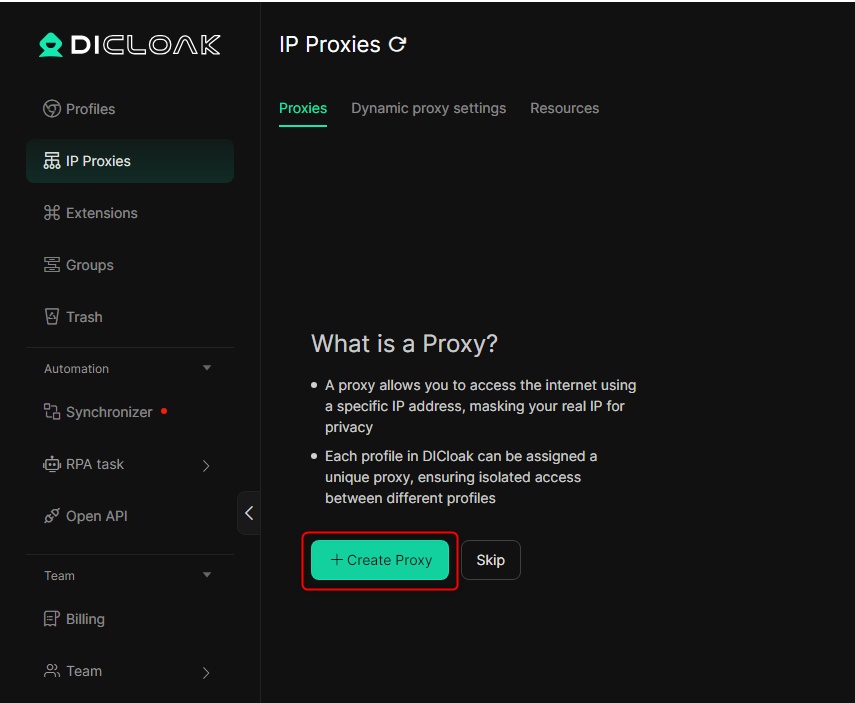
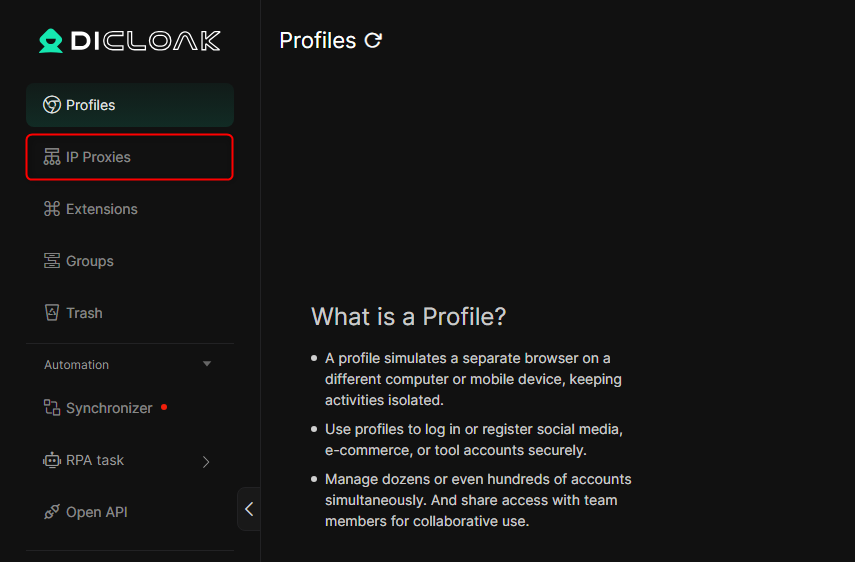 Click **Create Proxy** to set up a new proxy.
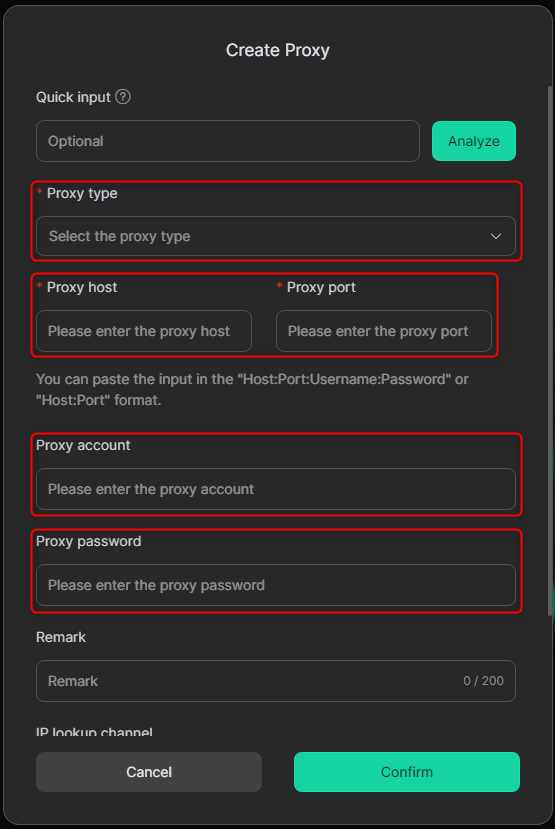
 Enter the required information: `Proxy type`, `Host`, `Port`, `Username (Account)`, and `Password`.
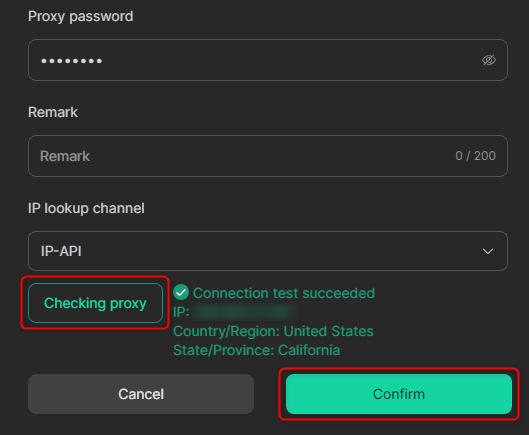
 Scroll down and click **Checking Proxy** to verify the connection. If successful, click **Confirm**.
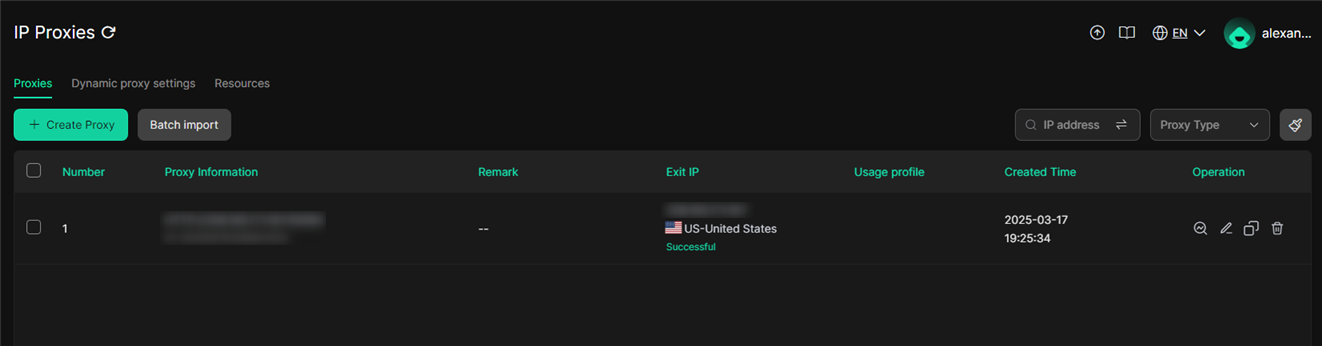
 The newly added proxy will now be listed in the **IP Proxies** table and ready for use.