> ## Documentation Index
> Fetch the complete documentation index at: https://docs.oculusproxies.com/llms.txt
> Use this file to discover all available pages before exploring further.
# How to Set Up Oculus Proxies With Identory Browser
> Optimize your multi-profile browsing experience with Oculus Proxies and Identory Browser. This guide will walk you through the process of integrating Oculus Proxies into Identory Browser, ensuring enhanced security, privacy, and seamless browsing across all your profiles.
 ## What is Identory Browser?
**Identory Browser** is a versatile anti-detect browser that enables the instant creation of unique digital identities for any website. It utilizes real device fingerprints, offers top-tier protection, and ensures complete privacy, allowing each profile to function independently in a secure environment. This makes it ideal for managing multiple accounts while reducing detection risks. By integrating **Oculus Proxies with Identory**, you can further enhance anonymity, strengthen security, and optimize browsing performance for a seamless and uninterrupted experience.
If you’re using **Oculus** to access search engines like **Google, Bing, or Yandex** and facing connection issues, the proxy type could be the reason. **ISP Premium Proxies** ensure stable and unrestricted access, preventing blocks that standard proxies might encounter. Switching to **ISP Premium Proxies** can help maintain smooth and reliable performance.
[Download](https://identory.com/en/download), install Identory Browser and launch it.
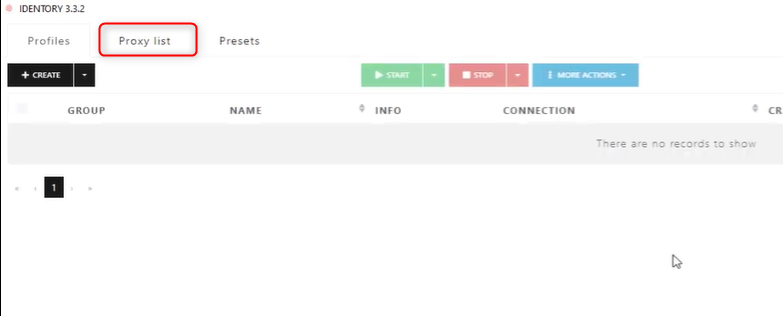
Head to the **Proxy List** section.
## What is Identory Browser?
**Identory Browser** is a versatile anti-detect browser that enables the instant creation of unique digital identities for any website. It utilizes real device fingerprints, offers top-tier protection, and ensures complete privacy, allowing each profile to function independently in a secure environment. This makes it ideal for managing multiple accounts while reducing detection risks. By integrating **Oculus Proxies with Identory**, you can further enhance anonymity, strengthen security, and optimize browsing performance for a seamless and uninterrupted experience.
If you’re using **Oculus** to access search engines like **Google, Bing, or Yandex** and facing connection issues, the proxy type could be the reason. **ISP Premium Proxies** ensure stable and unrestricted access, preventing blocks that standard proxies might encounter. Switching to **ISP Premium Proxies** can help maintain smooth and reliable performance.
[Download](https://identory.com/en/download), install Identory Browser and launch it.
Head to the **Proxy List** section.
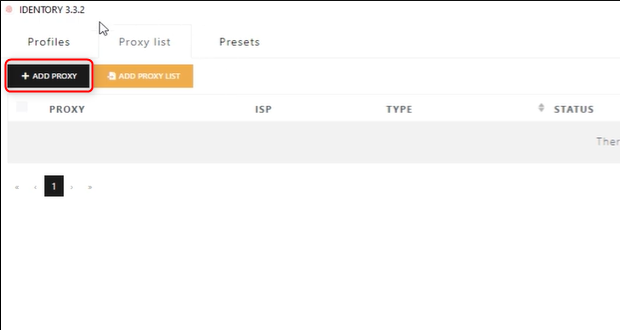
 Press on **ADD PROXY** to start the setup.
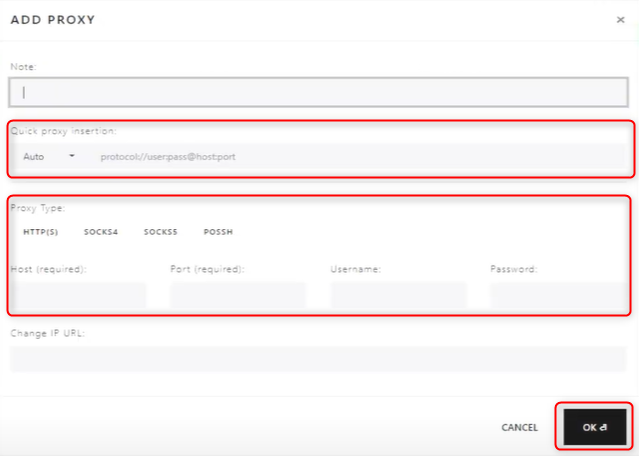
 You have two methods for adding a proxy:
1. Fast setup using the following format: `protocol://Username:Password@Host:Port`.
2. Insert your proxy's `Type`, `Host`, `Port`, `Username` and `Password`.
Press **OK** to save the settings.
You have two methods for adding a proxy:
1. Fast setup using the following format: `protocol://Username:Password@Host:Port`.
2. Insert your proxy's `Type`, `Host`, `Port`, `Username` and `Password`.
Press **OK** to save the settings.
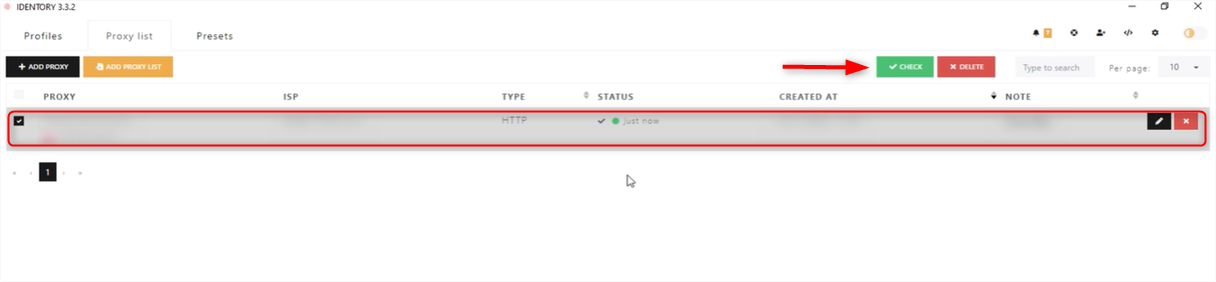
 The added proxy will now be visible in the list. To verify its functionality, click the **green CHECK button**.