> ## Documentation Index
> Fetch the complete documentation index at: https://docs.oculusproxies.com/llms.txt
> Use this file to discover all available pages before exploring further.
# How to Use Oculus Proxies With Insomnia
> Enhance your API development with Oculus Proxies in Insomnia. This guide will show you how to configure proxies for secure, private, and geo-targeted API testing, debugging, and design.
 ## What is Insomnia?
**Insomnia** is a robust API client that allows developers to send HTTP requests and inspect responses from REST APIs. With its user-friendly interface, it simplifies API debugging and testing. Integrating **Oculus Proxies** enhances security, protects privacy, and enables seamless testing from different geo-locations.
If you’re using **Oculus** to access search engines like **Google, Bing, or Yandex** and facing connection issues, the proxy type could be the reason. **ISP Premium Proxies** ensure stable and unrestricted access, preventing blocks that standard proxies might encounter. Switching to **ISP Premium Proxies** can help maintain smooth and reliable performance.
## How to Integrate Oculus Proxies With Insomnia
Sign up on [Insomnia website](https://insomnia.rest/) and download the application.
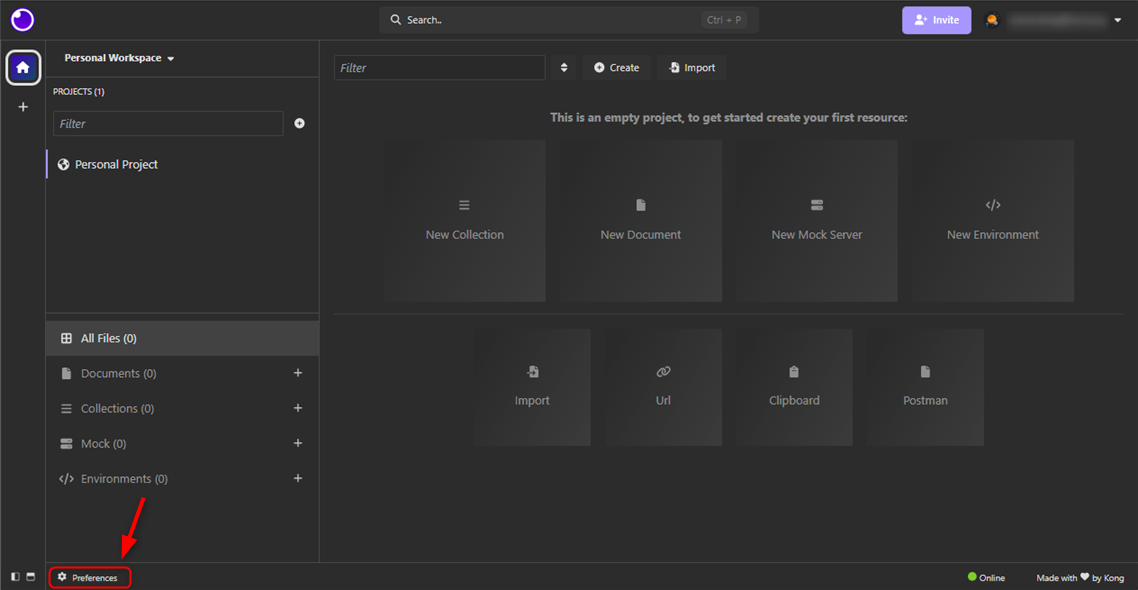
Open Insomnia and go to **Preferences** at the bottom of the interface.
## What is Insomnia?
**Insomnia** is a robust API client that allows developers to send HTTP requests and inspect responses from REST APIs. With its user-friendly interface, it simplifies API debugging and testing. Integrating **Oculus Proxies** enhances security, protects privacy, and enables seamless testing from different geo-locations.
If you’re using **Oculus** to access search engines like **Google, Bing, or Yandex** and facing connection issues, the proxy type could be the reason. **ISP Premium Proxies** ensure stable and unrestricted access, preventing blocks that standard proxies might encounter. Switching to **ISP Premium Proxies** can help maintain smooth and reliable performance.
## How to Integrate Oculus Proxies With Insomnia
Sign up on [Insomnia website](https://insomnia.rest/) and download the application.
Open Insomnia and go to **Preferences** at the bottom of the interface.
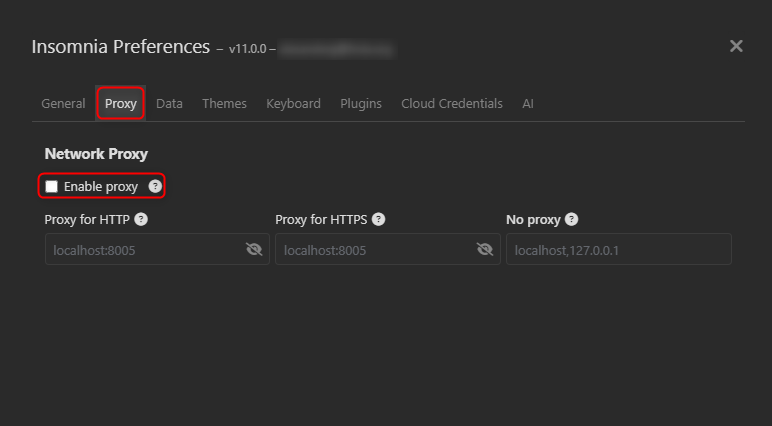
 Navigate to the **Proxy** tab and enable **Enable Proxy**.
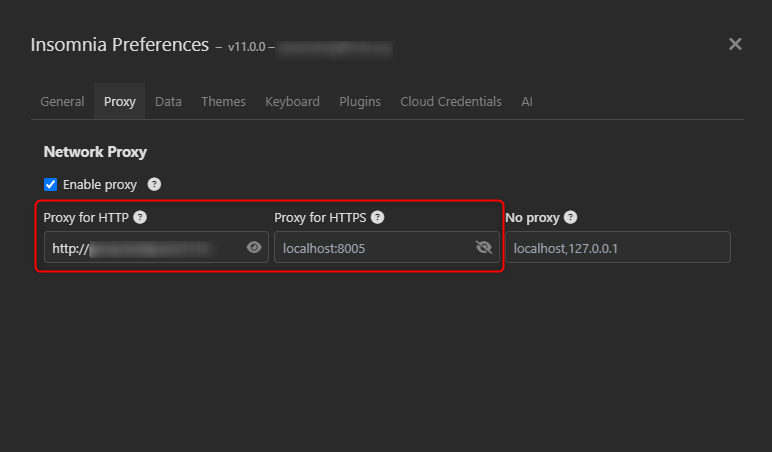
 Choose your preferred protocol (HTTP, HTTPS, or SOCKS5) and enter the proxy details in the specified format:
* For HTTP use: `http://proxy.oculus-proxy.com:port`.
* For HTTPS use: `https://proxy.oculus-proxy.com:port`.
* For SOCKS5 use: `socks5h://proxy.oculus-proxy.com:port`.
Choose your preferred protocol (HTTP, HTTPS, or SOCKS5) and enter the proxy details in the specified format:
* For HTTP use: `http://proxy.oculus-proxy.com:port`.
* For HTTPS use: `https://proxy.oculus-proxy.com:port`.
* For SOCKS5 use: `socks5h://proxy.oculus-proxy.com:port`.
 For proxy authentication, include the `Username` and `Password` in the **URL** inside your projects in the following way: `http://username:password@proxy.oculus-proxy.com:port`