> ## Documentation Index
> Fetch the complete documentation index at: https://docs.oculusproxies.com/llms.txt
> Use this file to discover all available pages before exploring further.
# How to Set Up Oculus Proxies With Insomniac
> Pairing Insomniac with Oculus Proxies strengthens your automation setup by providing secure, anonymous connections that reduce detection risks and support stable operation.
 ## What is Insomniac?
**Insomniac** is a purpose-built browser tailored for online purchasing, designed to hide your digital footprint through independently managed sessions. With the help of **Oculus Proxies**, you can apply a different proxy to each tab, giving every session its own IP address and keeping your browsing behavior completely hidden.
If you’re using **Oculus** to access search engines like **Google, Bing, or Yandex** and facing connection issues, the proxy type could be the reason. **ISP Premium Proxies** ensure stable and unrestricted access, preventing blocks that standard proxies might encounter. Switching to **ISP Premium Proxies** can help maintain smooth and reliable performance.
## How to Integrate Oculus Proxies With Insomniac
Visit the Insomniac website and [download](https://insomniacbrowser.com/download/) the browser to your device.
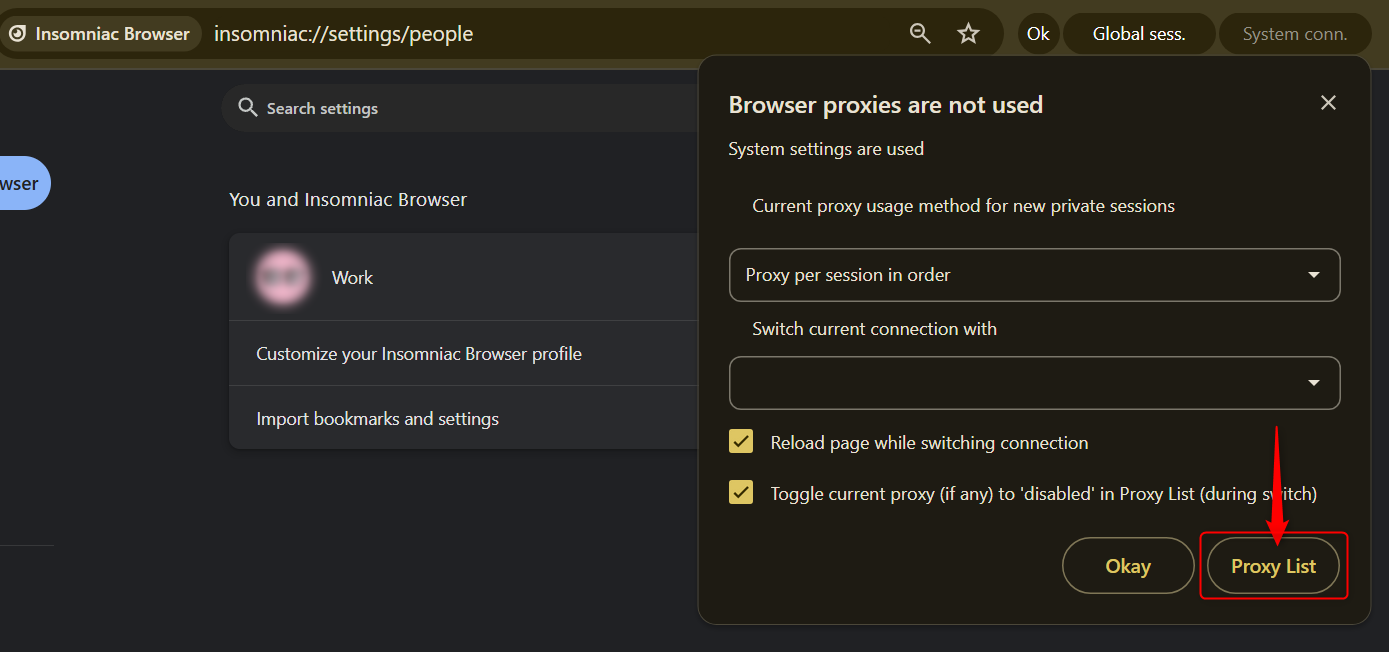
After launching and logging in, click on **Global Sess → Proxy List** to manage your proxy configurations.
## What is Insomniac?
**Insomniac** is a purpose-built browser tailored for online purchasing, designed to hide your digital footprint through independently managed sessions. With the help of **Oculus Proxies**, you can apply a different proxy to each tab, giving every session its own IP address and keeping your browsing behavior completely hidden.
If you’re using **Oculus** to access search engines like **Google, Bing, or Yandex** and facing connection issues, the proxy type could be the reason. **ISP Premium Proxies** ensure stable and unrestricted access, preventing blocks that standard proxies might encounter. Switching to **ISP Premium Proxies** can help maintain smooth and reliable performance.
## How to Integrate Oculus Proxies With Insomniac
Visit the Insomniac website and [download](https://insomniacbrowser.com/download/) the browser to your device.
After launching and logging in, click on **Global Sess → Proxy List** to manage your proxy configurations.
 You can either:
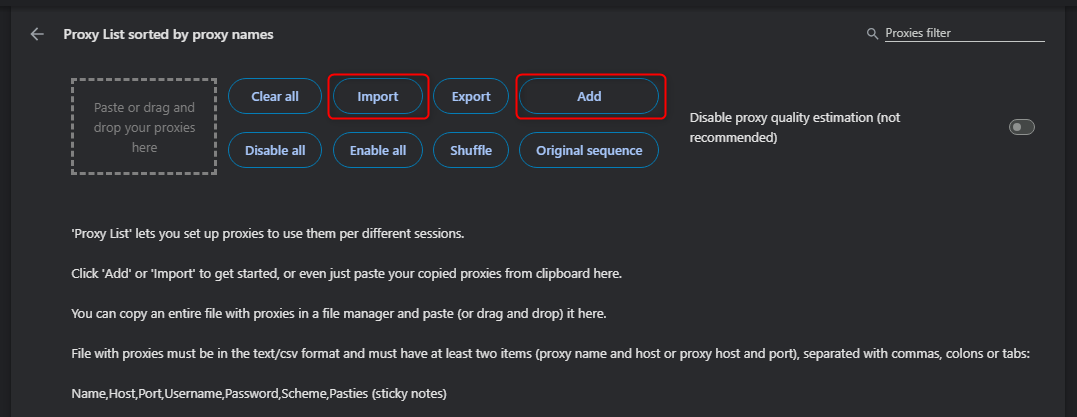
1. Click **Add** to manually enter a single proxy.
2. Click **Import** to upload a `.txt` file containing multiple proxies.
You can either:
1. Click **Add** to manually enter a single proxy.
2. Click **Import** to upload a `.txt` file containing multiple proxies.
 ### 1. Adding a single proxy:
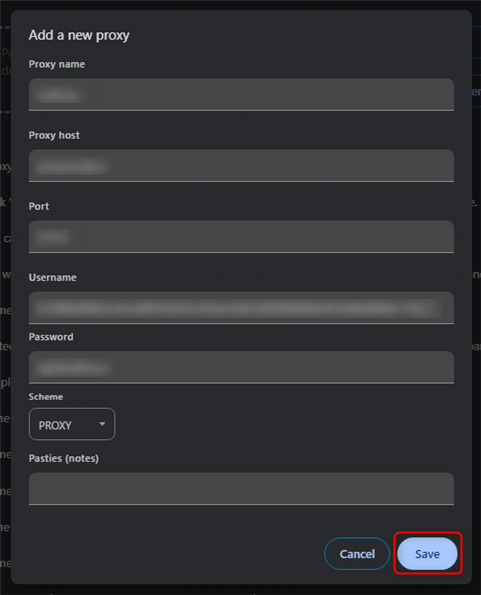
Hit the **Add** option, enter the proxy details: `host`, `port`, `username`, and `password`, then click **Save**.
### 1. Adding a single proxy:
Hit the **Add** option, enter the proxy details: `host`, `port`, `username`, and `password`, then click **Save**.
 ### 2. Adding multiple proxies:
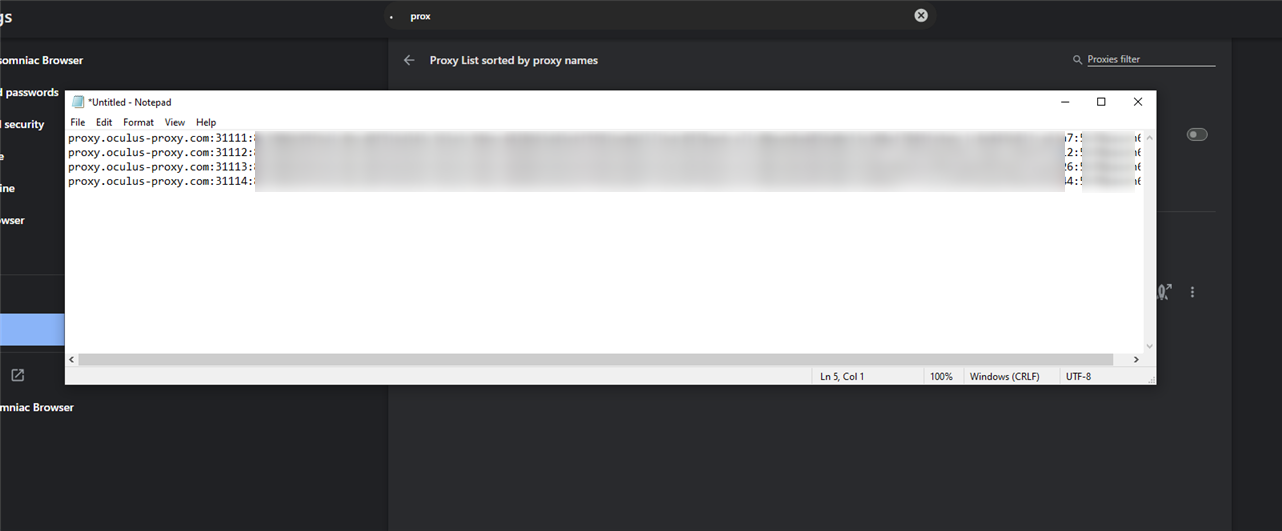
First create a `.txt` file with each proxy in the format: `host,port,username,password`, save the file, and upload it using the **Import** button.
### 2. Adding multiple proxies:
First create a `.txt` file with each proxy in the format: `host,port,username,password`, save the file, and upload it using the **Import** button.