> ## Documentation Index
> Fetch the complete documentation index at: https://docs.oculusproxies.com/llms.txt
> Use this file to discover all available pages before exploring further.
# How to Set Up Oculus Proxies on iOS 🍏
> Unlock secure, private browsing on your iOS device! With Oculus Proxies, you can enhance your online privacy, access geo-restricted content, and enjoy a more reliable connection. This guide provides step-by-step instructions for configuring proxies on your iOS device, ensuring a seamless and protected browsing experience.
 ## Why Use Oculus Proxies on iOS?
Setting up **Oculus Proxies** on your iOS device provides several benefits:
* **Enhanced Privacy** – Keep your IP address hidden and protect your personal data.
* **Global Access** – Connect through different regions to unlock geo-restricted websites and services.
* **Reliable Connections** – Reduce the risk of blocks or interruptions while browsing, shopping, or managing accounts.
If you’re using **Oculus** to access search engines like **Google, Bing, or Yandex** and facing connection issues, the proxy type could be the reason. **ISP Premium Proxies** ensure stable and unrestricted access, preventing blocks that standard proxies might encounter. Switching to **ISP Premium Proxies** can help maintain smooth and reliable performance.
## How to Set Up Oculus Proxies on iOS
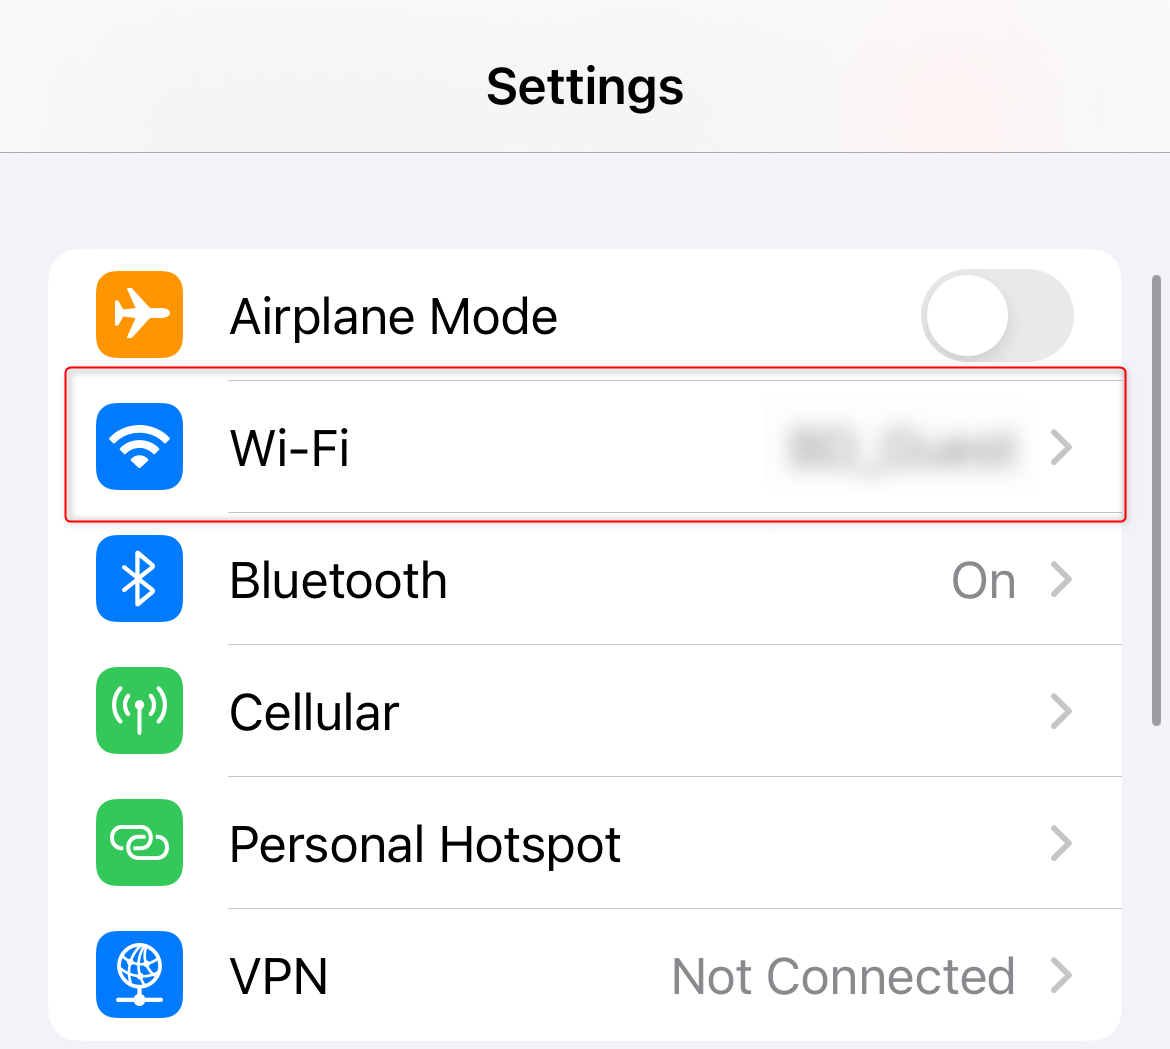
1\. Open the **Settings** app on your iOS device.
2\. Tap **Wi-Fi** and find your connected network.
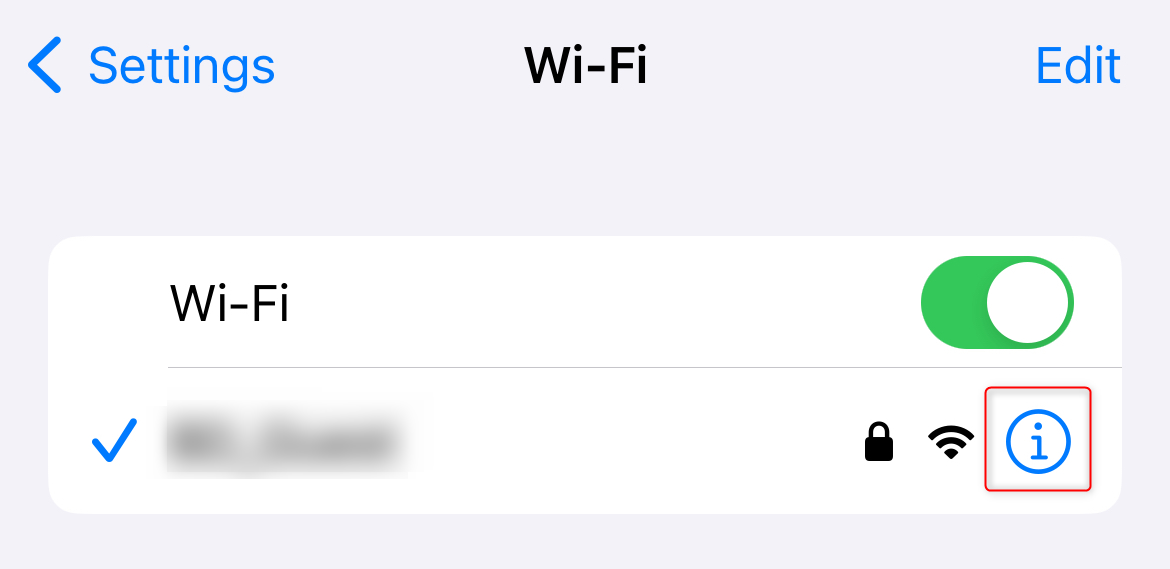
3\. Tap the **i** (information) icon next to the network name.
## Why Use Oculus Proxies on iOS?
Setting up **Oculus Proxies** on your iOS device provides several benefits:
* **Enhanced Privacy** – Keep your IP address hidden and protect your personal data.
* **Global Access** – Connect through different regions to unlock geo-restricted websites and services.
* **Reliable Connections** – Reduce the risk of blocks or interruptions while browsing, shopping, or managing accounts.
If you’re using **Oculus** to access search engines like **Google, Bing, or Yandex** and facing connection issues, the proxy type could be the reason. **ISP Premium Proxies** ensure stable and unrestricted access, preventing blocks that standard proxies might encounter. Switching to **ISP Premium Proxies** can help maintain smooth and reliable performance.
## How to Set Up Oculus Proxies on iOS
1\. Open the **Settings** app on your iOS device.
2\. Tap **Wi-Fi** and find your connected network.
3\. Tap the **i** (information) icon next to the network name.
 \\
\\
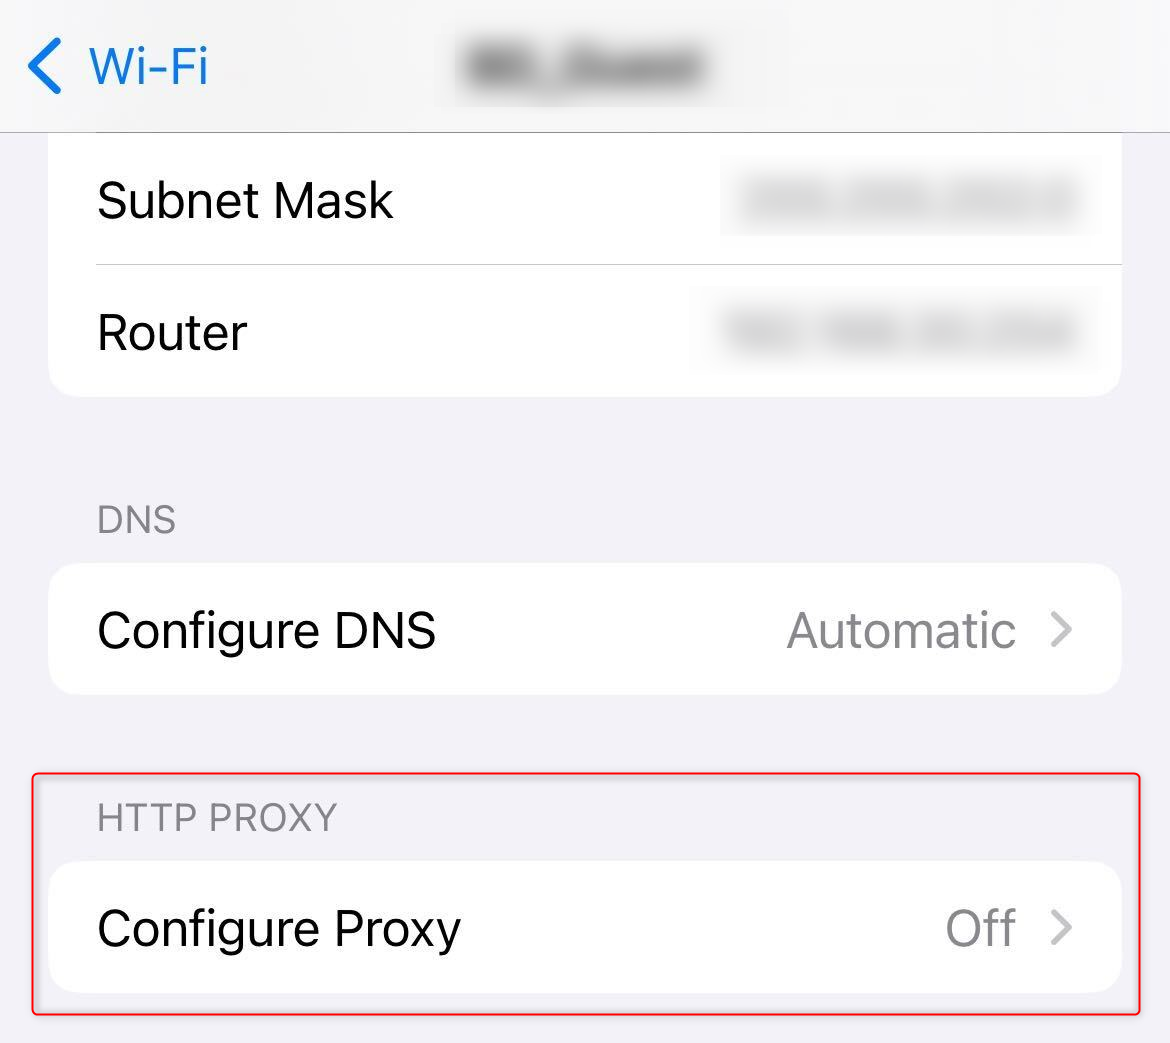
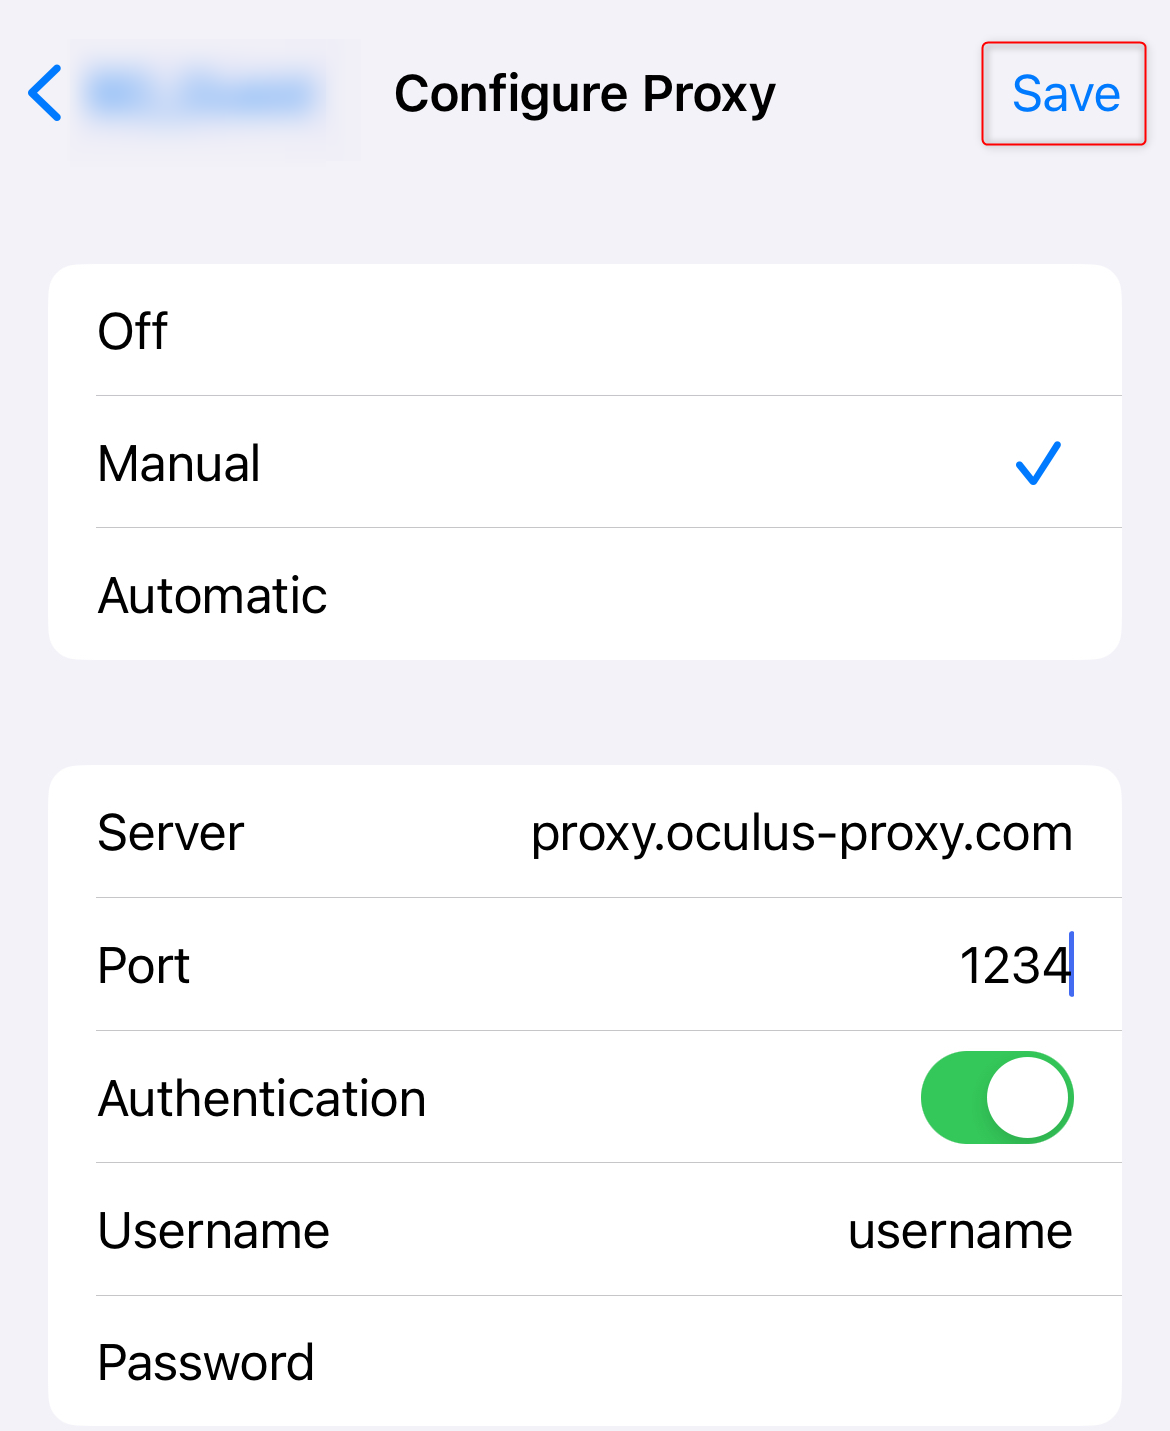
 1\. Scroll down to the **HTTP Proxy** section.
2\. Select **Manual** to enable custom proxy settings.
3\. Toggle **Authentication** to *On*.
1\. Scroll down to the **HTTP Proxy** section.
2\. Select **Manual** to enable custom proxy settings.
3\. Toggle **Authentication** to *On*.
 \\
\\
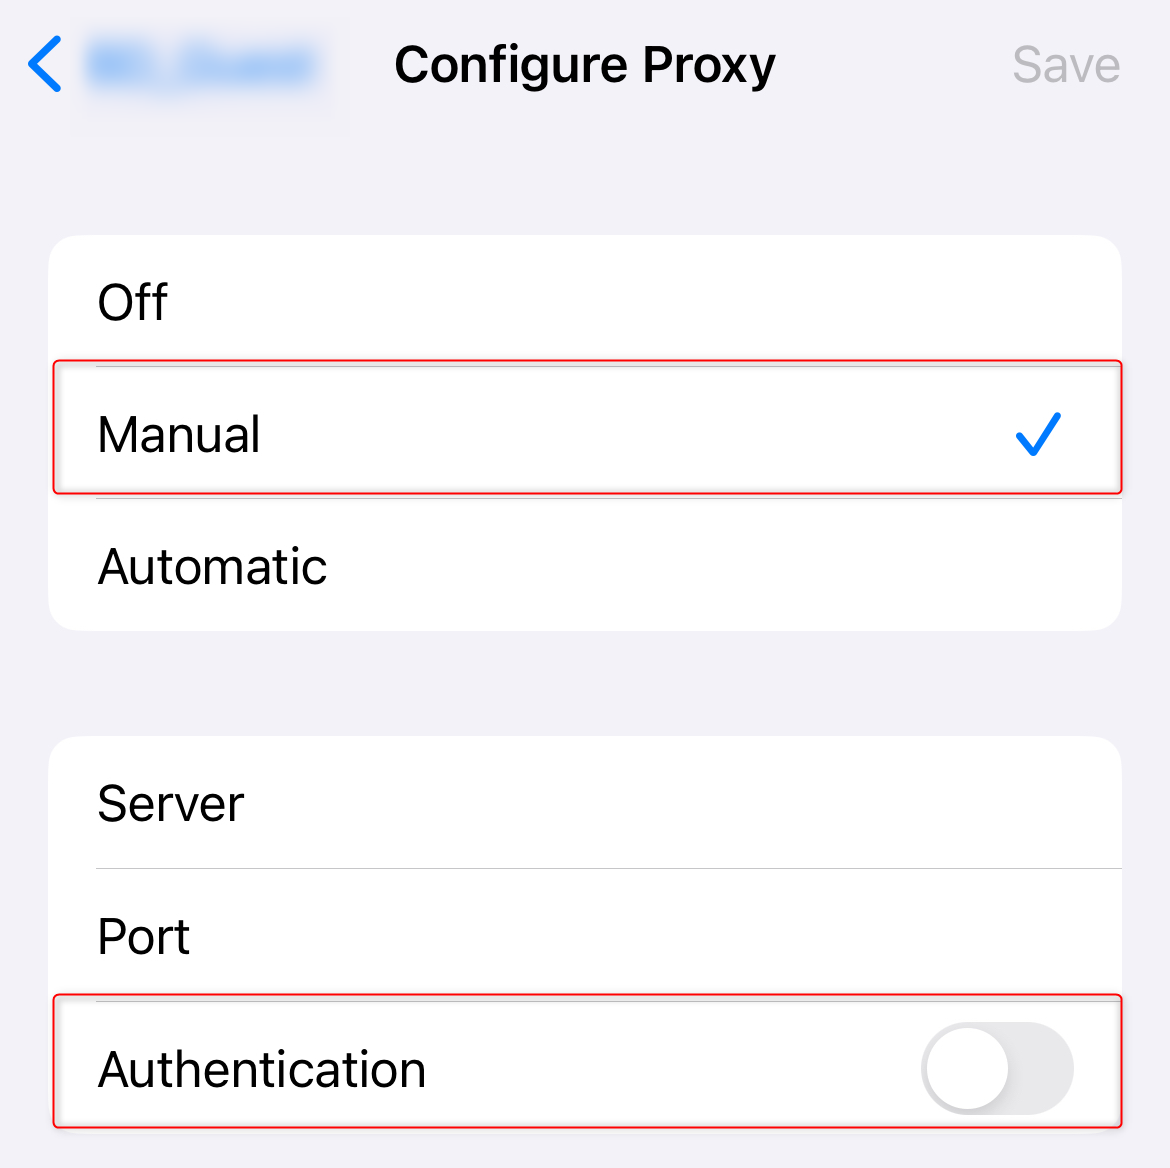 1\. **Server**: Input `proxy.oculus-proxy.com` or the Host provided in your dashboard.
2\. **Port**: Enter the Port number from your [Oculus Dashboard](https://oculusproxies.com/dashboard/page/plans).
3\. **Username** and **Password**: Add your Oculus Proxy login credentials.
4\. Double-check the details for accuracy and tap **Save** to apply the changes.
1\. **Server**: Input `proxy.oculus-proxy.com` or the Host provided in your dashboard.
2\. **Port**: Enter the Port number from your [Oculus Dashboard](https://oculusproxies.com/dashboard/page/plans).
3\. **Username** and **Password**: Add your Oculus Proxy login credentials.
4\. Double-check the details for accuracy and tap **Save** to apply the changes.
 1\. Open **Safari** or any browser on your device.
2\. Visit [httpbin.org/ip](http://httpbin.org/ip) to check your IP address.
3\. Confirm that the displayed IP matches the one assigned by Oculus Proxies.
**Success!** You’ve successfully configured **Oculus Proxies** on your iOS device. Enjoy **secure, private browsing, unlock global content, and stay anonymous online**. 🚀
1\. Open **Safari** or any browser on your device.
2\. Visit [httpbin.org/ip](http://httpbin.org/ip) to check your IP address.
3\. Confirm that the displayed IP matches the one assigned by Oculus Proxies.
**Success!** You’ve successfully configured **Oculus Proxies** on your iOS device. Enjoy **secure, private browsing, unlock global content, and stay anonymous online**. 🚀