> ## Documentation Index
> Fetch the complete documentation index at: https://docs.oculusproxies.com/llms.txt
> Use this file to discover all available pages before exploring further.
# How to Set Up Oculus Proxies With Lauth Browser
> Enhance your privacy and streamline your online activities by integrating Oculus Proxies with Lauth Browser. This guide walks you through configuring secure and stable proxy connections for your browser profiles.
 ## What is Lauth Browser?
**Lauth Browser** is an advanced anti-detect browser designed to help users manage multiple browser profiles without detection. Whether you're running multiple accounts, conducting research, or enhancing your online security, it prevents tracking and fingerprinting.
By integrating **Oculus Proxies**, you add an extra layer of security and anonymity, making it easier to bypass geo-restrictions, IP bans, and other online limitations.
If you're using **Oculus** to access search engines like **Google, Bing, or Yandex** and facing connection issues, the proxy type could be the reason. **ISP Premium Proxies** ensure stable and unrestricted access, preventing blocks that standard proxies might encounter. Switching to **ISP Premium Proxies** can help maintain smooth and reliable performance.
## How to Set Up Oculus Proxies in Lauth Browser
Start by downloading [Lauth Browser](https://www.lauth.com.br/baixar-lauth) and following the installation steps.
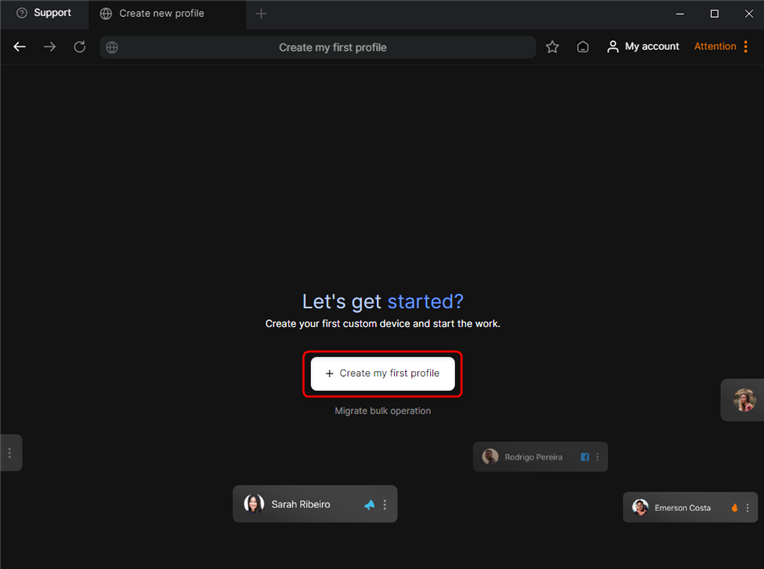
Open Lauth Browser and click **Create my first profile** to set up a new browsing session.
## What is Lauth Browser?
**Lauth Browser** is an advanced anti-detect browser designed to help users manage multiple browser profiles without detection. Whether you're running multiple accounts, conducting research, or enhancing your online security, it prevents tracking and fingerprinting.
By integrating **Oculus Proxies**, you add an extra layer of security and anonymity, making it easier to bypass geo-restrictions, IP bans, and other online limitations.
If you're using **Oculus** to access search engines like **Google, Bing, or Yandex** and facing connection issues, the proxy type could be the reason. **ISP Premium Proxies** ensure stable and unrestricted access, preventing blocks that standard proxies might encounter. Switching to **ISP Premium Proxies** can help maintain smooth and reliable performance.
## How to Set Up Oculus Proxies in Lauth Browser
Start by downloading [Lauth Browser](https://www.lauth.com.br/baixar-lauth) and following the installation steps.
Open Lauth Browser and click **Create my first profile** to set up a new browsing session.
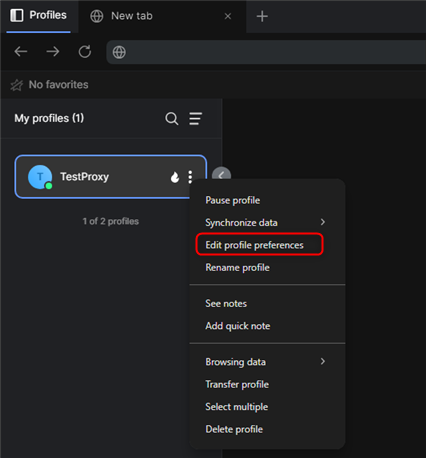
 In the profile setup, navigate to **Edit profile preferences** to access customization options.
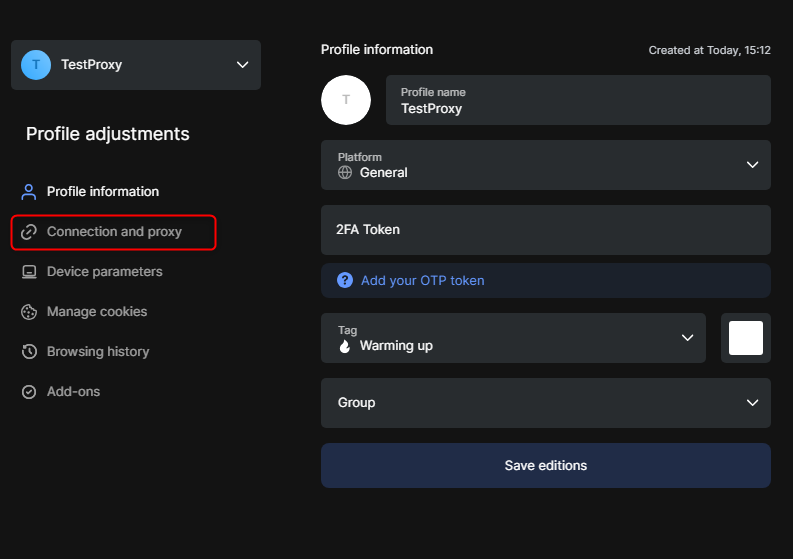
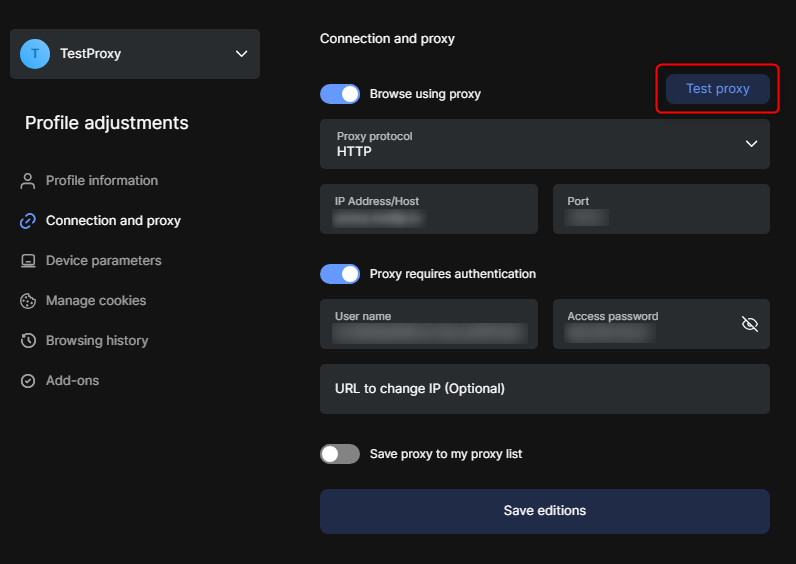
 Find the **Connection and Proxy** section to add your Oculus Proxy details.
 Enable the **Browse using proxy** option and enter the following details:
* **Host:** `proxy.oculus-proxy.com`
* **Port:** (Your assigned port number)
* **User name:** (Your Oculus Proxy username)
* **Access password:** (Your Oculus Proxy password)
Click **Save editions** to confirm your settings.
Enable the **Browse using proxy** option and enter the following details:
* **Host:** `proxy.oculus-proxy.com`
* **Port:** (Your assigned port number)
* **User name:** (Your Oculus Proxy username)
* **Access password:** (Your Oculus Proxy password)
Click **Save editions** to confirm your settings.
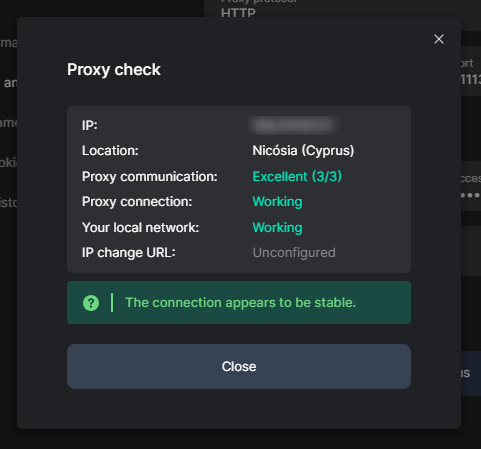
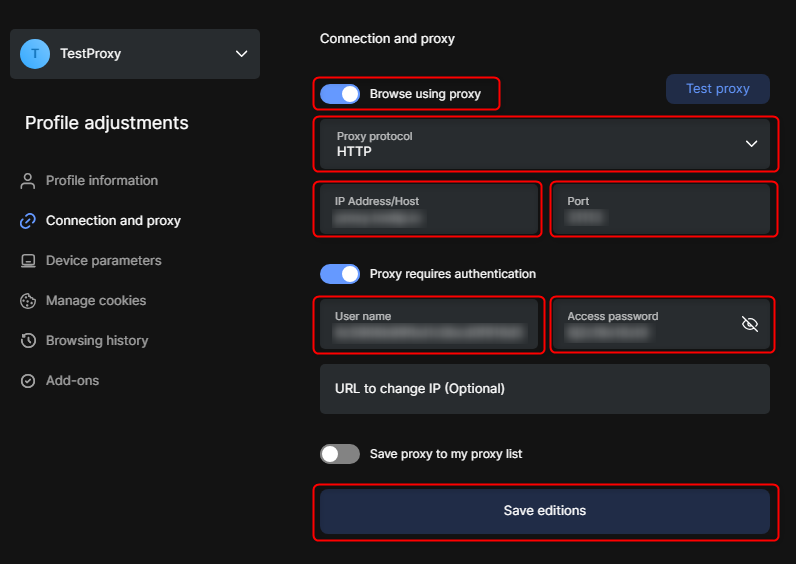 Click **Test Proxy** to check if everything is working correctly. If successful, you're good to go!
 By following these steps, you’ll successfully integrate **Oculus Proxies** with **Lauth Browser**, ensuring secure and uninterrupted browsing. 🚀