> ## Documentation Index
> Fetch the complete documentation index at: https://docs.oculusproxies.com/llms.txt
> Use this file to discover all available pages before exploring further.
# How to Set Up Oculus Proxies With Logii Browser
> Get the most out of commercial operations management and multiple online accounts with Logii Browser integrated with Oculus Proxies! Follow this step-by-step guide to set it up seamlessly.
 ## What is Logii Browser?
**Logii Browser** is a privacy-focused anti-detect browser designed for online professionals, including affiliate marketers, e-commerce sellers, and social media managers. It helps users stay hidden, protect their identity, and manage multiple accounts without detection. With features like secure browsing, automation capabilities, proxy support, and anti-fingerprinting technology, Logii ensures a seamless and undetectable experience. By integrating **Oculus Proxies**, you can further enhance privacy, access geo-restricted content, and maintain a stable browsing environment.
If you're using **Oculus** to access search engines like **Google, Bing, or Yandex** and facing connection issues, the proxy type could be the reason. **ISP Premium Proxies** ensure stable and unrestricted access, preventing blocks that standard proxies might encounter. Switching to **ISP Premium Proxies** can help maintain smooth and reliable performance.
## How to Set Up Oculus Proxies in Logii Browser
Download and install [Logii](https://logii.in/freeversion#).
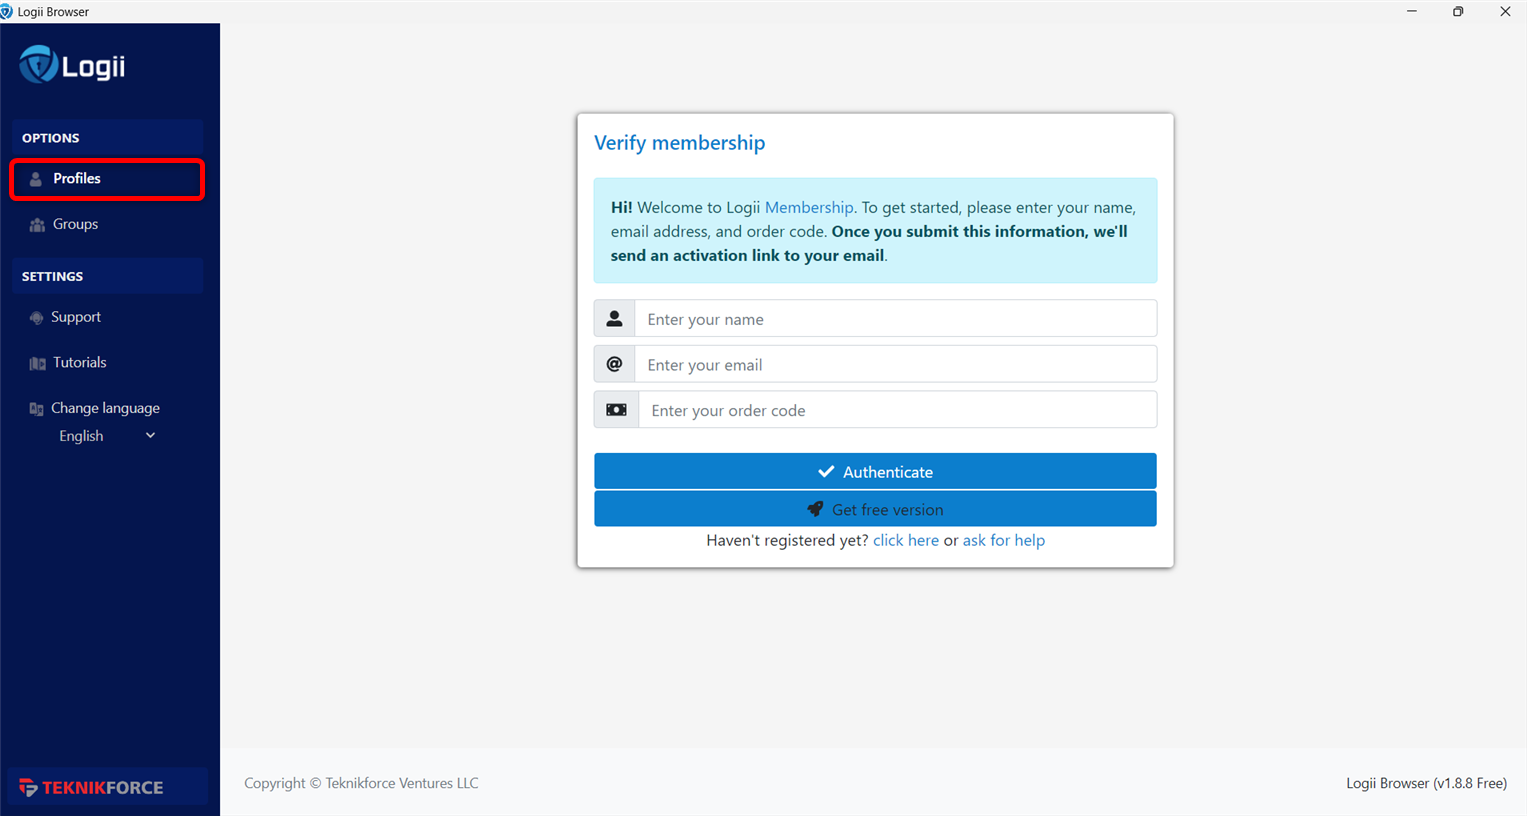
Open the browser and navigate to the **Profiles** section.
## What is Logii Browser?
**Logii Browser** is a privacy-focused anti-detect browser designed for online professionals, including affiliate marketers, e-commerce sellers, and social media managers. It helps users stay hidden, protect their identity, and manage multiple accounts without detection. With features like secure browsing, automation capabilities, proxy support, and anti-fingerprinting technology, Logii ensures a seamless and undetectable experience. By integrating **Oculus Proxies**, you can further enhance privacy, access geo-restricted content, and maintain a stable browsing environment.
If you're using **Oculus** to access search engines like **Google, Bing, or Yandex** and facing connection issues, the proxy type could be the reason. **ISP Premium Proxies** ensure stable and unrestricted access, preventing blocks that standard proxies might encounter. Switching to **ISP Premium Proxies** can help maintain smooth and reliable performance.
## How to Set Up Oculus Proxies in Logii Browser
Download and install [Logii](https://logii.in/freeversion#).
Open the browser and navigate to the **Profiles** section.
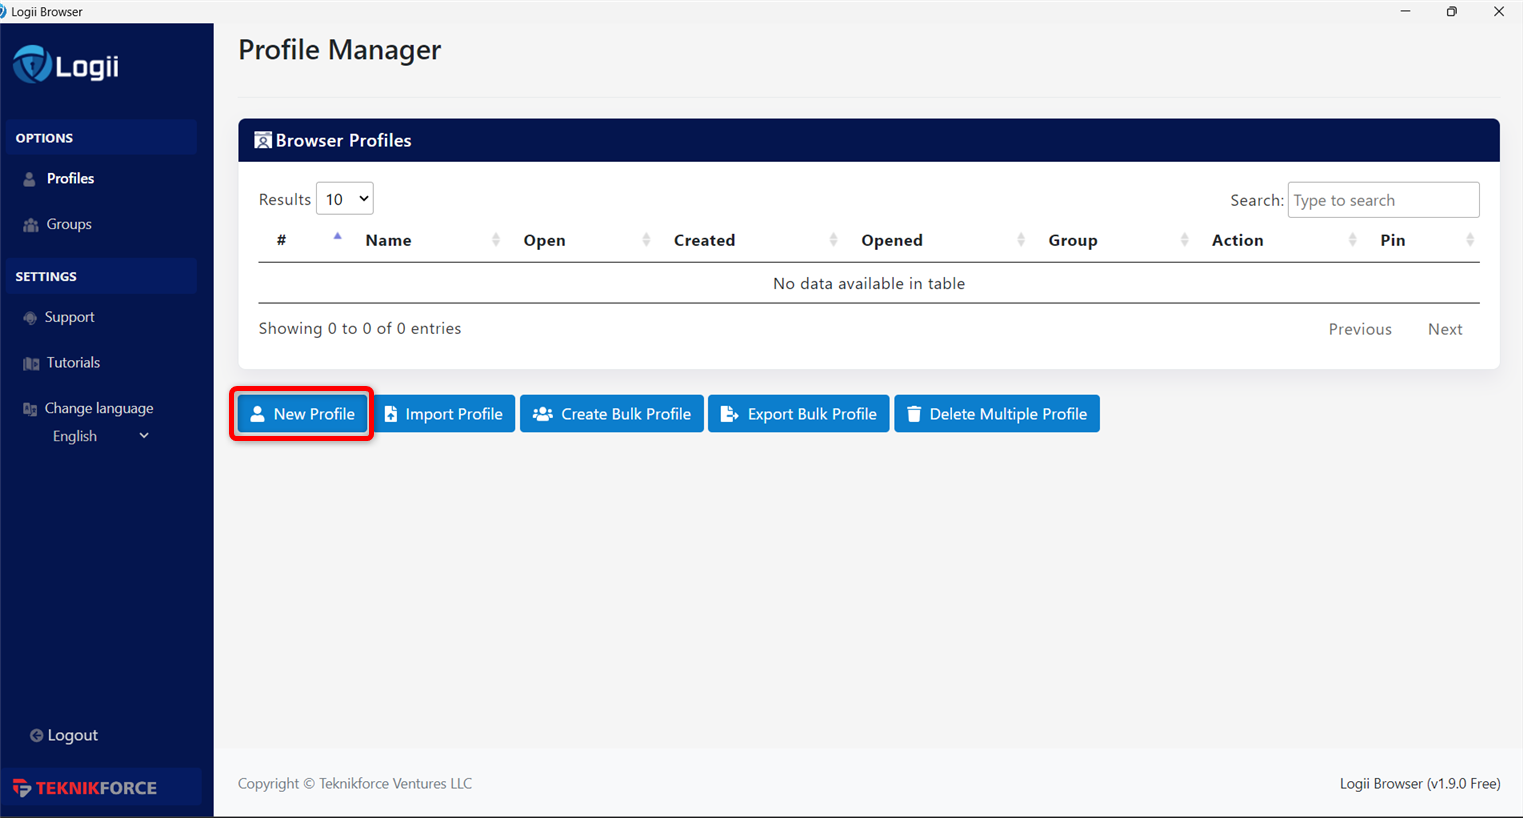
 Click **New Profile** to create a new browsing profile.
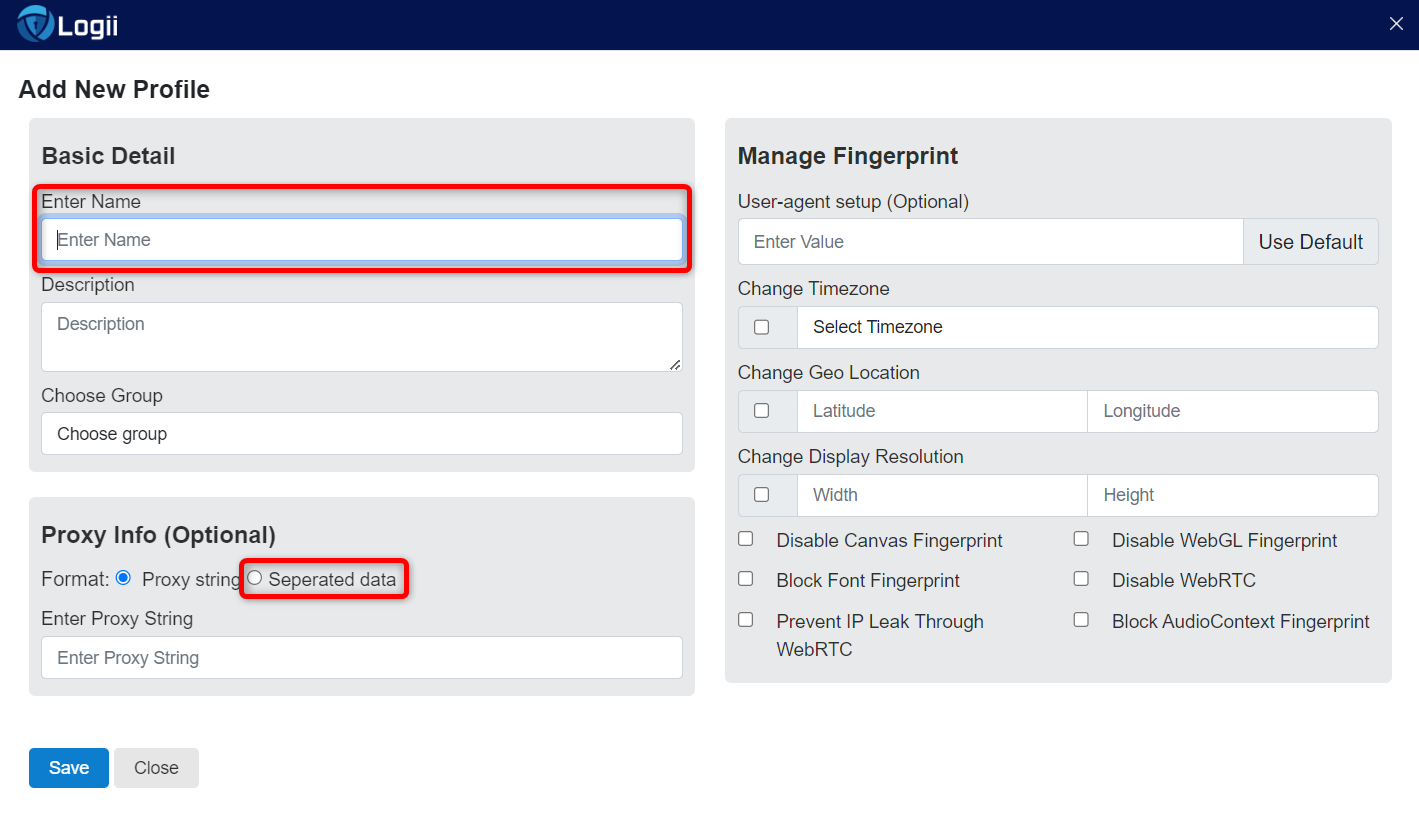
 Assign a **Name** to the profile and, under the Proxy Info tab, select **Separated data**.
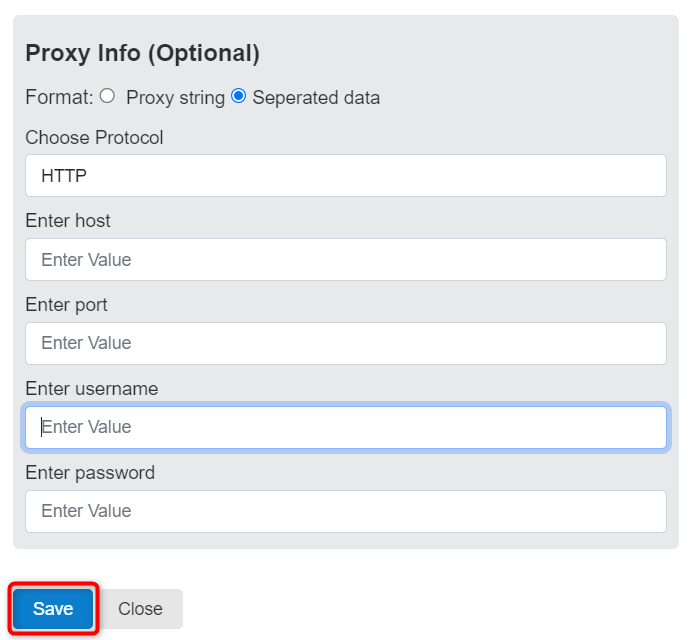
 Enter the required proxy details: `Protocol`, `Host`, `Port`, `Username`, and `Password`, then click **Save**.
 Return to the **Profile Manager** and start browsing with your configured proxy!