> ## Documentation Index
> Fetch the complete documentation index at: https://docs.oculusproxies.com/llms.txt
> Use this file to discover all available pages before exploring further.
# How to Set Up Oculus Proxies With Norconex
> Need flexible, region-aware, and reliable web crawling? Norconex + Oculus Proxies has you covered.
 ## What is Norconex?
**Norconex** is a powerful, Java-based open-source web crawler designed for flexibility and deep customization. It supports a wide range of file types, integrates easily with third-party tools, and uses XML-based configuration. Key capabilities include data extraction, parsing, OCR, JavaScript rendering, and full compliance with robots.txt—making it perfect for indexing, content aggregation, and SEO optimization. When paired with **Oculus Proxies**, you can bypass geo-restrictions, prevent IP bans, and ensure stable, region-specific access for large-scale, reliable web crawling.
If you're using **Oculus** to access search engines like **Google, Bing, or Yandex** and facing connection issues, the proxy type could be the reason. **ISP Premium Proxies** ensure stable and unrestricted access, preventing blocks that standard proxies might encounter. Switching to **ISP Premium Proxies** can help maintain smooth and reliable performance.
## How to Integrate Oculus Proxies with Norconex
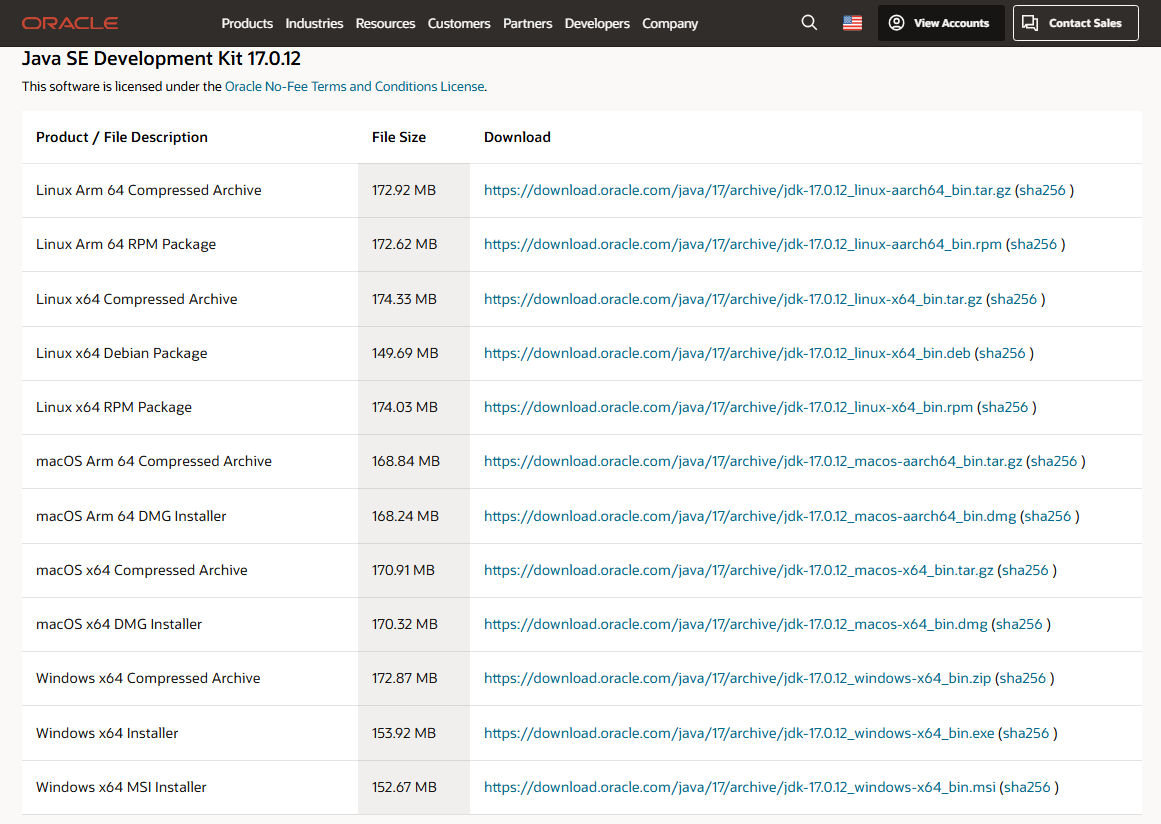
Download and set up the correct version of the **Java Development Kit(JDK)** that matches your operating system.
## What is Norconex?
**Norconex** is a powerful, Java-based open-source web crawler designed for flexibility and deep customization. It supports a wide range of file types, integrates easily with third-party tools, and uses XML-based configuration. Key capabilities include data extraction, parsing, OCR, JavaScript rendering, and full compliance with robots.txt—making it perfect for indexing, content aggregation, and SEO optimization. When paired with **Oculus Proxies**, you can bypass geo-restrictions, prevent IP bans, and ensure stable, region-specific access for large-scale, reliable web crawling.
If you're using **Oculus** to access search engines like **Google, Bing, or Yandex** and facing connection issues, the proxy type could be the reason. **ISP Premium Proxies** ensure stable and unrestricted access, preventing blocks that standard proxies might encounter. Switching to **ISP Premium Proxies** can help maintain smooth and reliable performance.
## How to Integrate Oculus Proxies with Norconex
Download and set up the correct version of the **Java Development Kit(JDK)** that matches your operating system.
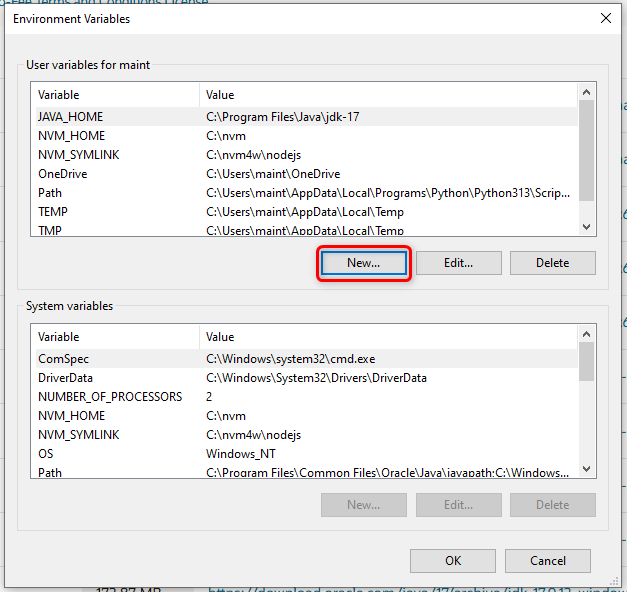
 In the Windows search bar, type **Environment Variables** and select **Edit the system environment variables**. Under **User variables for \[USERNAME]**, click **New** to add a new variable.
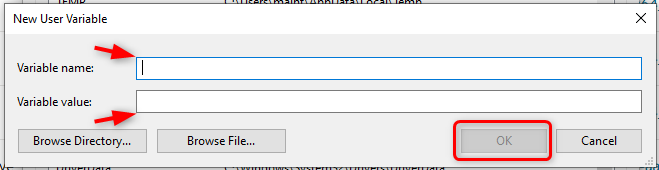
 In the **Variable name** field, input `JAVA_HOME`. For the **Variable value**, provide the `full path to your installed JDK directory`.
Confirm by clicking **OK**.
In the **Variable name** field, input `JAVA_HOME`. For the **Variable value**, provide the `full path to your installed JDK directory`.
Confirm by clicking **OK**.
 Visit the official **Norconex website** and download the most recent release of the software.
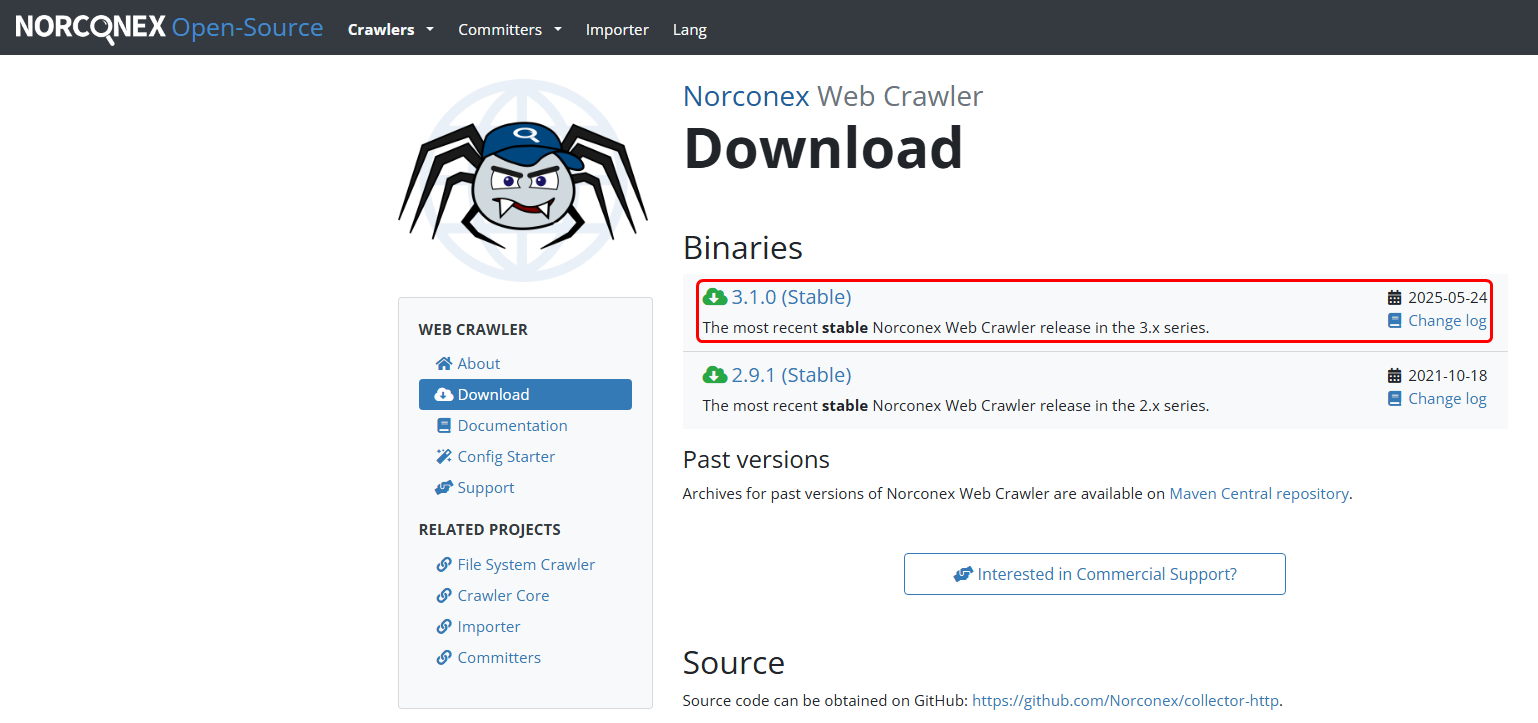 Create a dedicated folder for Norconex (e.g., C:\Norconex). Locate the downloaded .zip archive, right-click it, and extract the contents into the folder you just created.
Then go to: `Norconex → Examples → collector-http-config-reference.xml`.
Open this file using a text editor such as Notepad for example.
Within the file find the `` and `` tags, and place the necessary configuration code between them.
```bash theme={null}
proxy.oculus-proxy.com
12321 <-Replace with your port
http <-or “https” if you bought TLS exits
your-username <-Replace with your username
your-password <-Replace with your password
.sample\.co\.jp. <-Apply proxy only for matching URLs
```
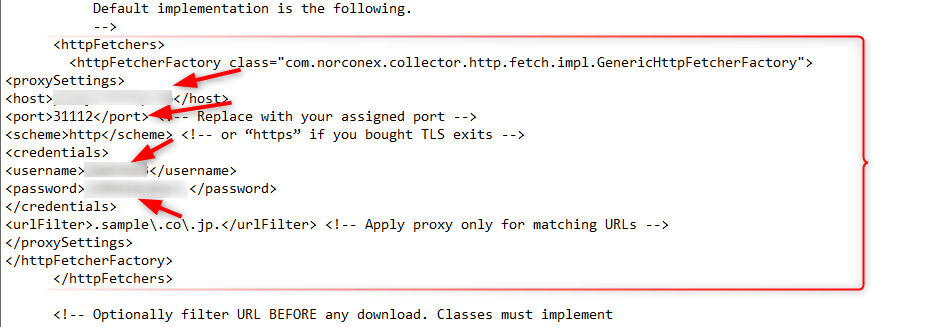
Double-check that the XML file structure is properly updated with your changes. It should resemble the provided example:
Create a dedicated folder for Norconex (e.g., C:\Norconex). Locate the downloaded .zip archive, right-click it, and extract the contents into the folder you just created.
Then go to: `Norconex → Examples → collector-http-config-reference.xml`.
Open this file using a text editor such as Notepad for example.
Within the file find the `` and `` tags, and place the necessary configuration code between them.
```bash theme={null}
proxy.oculus-proxy.com
12321 <-Replace with your port
http <-or “https” if you bought TLS exits
your-username <-Replace with your username
your-password <-Replace with your password
.sample\.co\.jp. <-Apply proxy only for matching URLs
```
Double-check that the XML file structure is properly updated with your changes. It should resemble the provided example: