> ## Documentation Index
> Fetch the complete documentation index at: https://docs.oculusproxies.com/llms.txt
> Use this file to discover all available pages before exploring further.
# How to Set Up Oculus Proxies With Octo Browser
> Supercharge your multi-account management! Integrating Oculus Proxies with Octo Browser ensures secure, efficient, and undetectable browsing. Whether you’re managing multiple accounts, web scraping, or enhancing online privacy, this guide will walk you through the setup process step by step.
 ## What is Octo Browser?
**Octo Browser** is a versatile anti-detect browser designed for managing multiple accounts without risking detection or bans. It creates isolated profiles with unique IP addresses and device fingerprints, keeping accounts separate and undetectable.
Whether you’re working in marketing, e-commerce, or web scraping, **Octo Browser** offers features like automation, team collaboration, and proxy support (HTTP, HTTPS, SOCKS5) to streamline your workflows securely and efficiently.
If you're using **Oculus** to access search engines like **Google, Bing, or Yandex** and facing connection issues, the proxy type could be the reason. **ISP Premium Proxies** ensure stable and unrestricted access, preventing blocks that standard proxies might encounter. Switching to **ISP Premium Proxies** can help maintain smooth and reliable performance.
## How to Integrate Oculus Proxies with Octo Browser
[Download](https://octobrowser.net/download/) and install Octo Browser, then log in to your account.
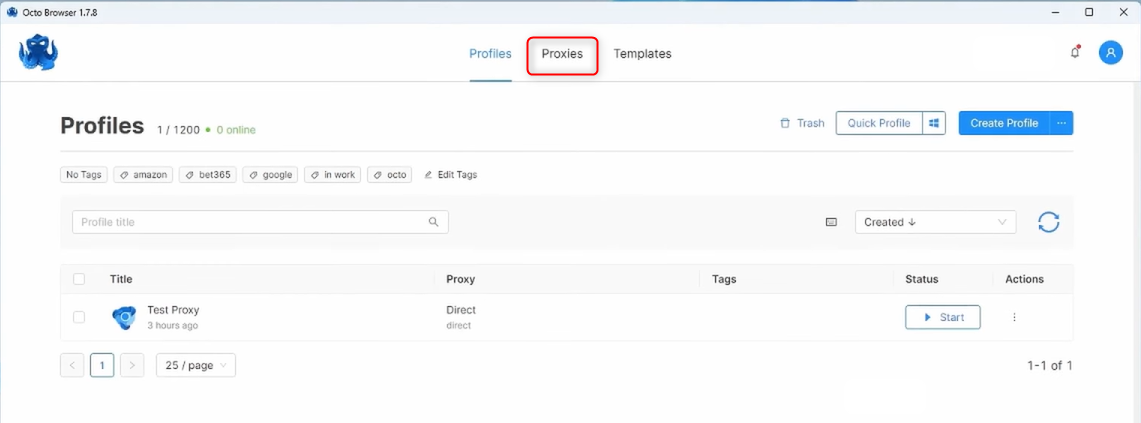
Go to the **Proxies** tab at the top of the application.
## What is Octo Browser?
**Octo Browser** is a versatile anti-detect browser designed for managing multiple accounts without risking detection or bans. It creates isolated profiles with unique IP addresses and device fingerprints, keeping accounts separate and undetectable.
Whether you’re working in marketing, e-commerce, or web scraping, **Octo Browser** offers features like automation, team collaboration, and proxy support (HTTP, HTTPS, SOCKS5) to streamline your workflows securely and efficiently.
If you're using **Oculus** to access search engines like **Google, Bing, or Yandex** and facing connection issues, the proxy type could be the reason. **ISP Premium Proxies** ensure stable and unrestricted access, preventing blocks that standard proxies might encounter. Switching to **ISP Premium Proxies** can help maintain smooth and reliable performance.
## How to Integrate Oculus Proxies with Octo Browser
[Download](https://octobrowser.net/download/) and install Octo Browser, then log in to your account.
Go to the **Proxies** tab at the top of the application.
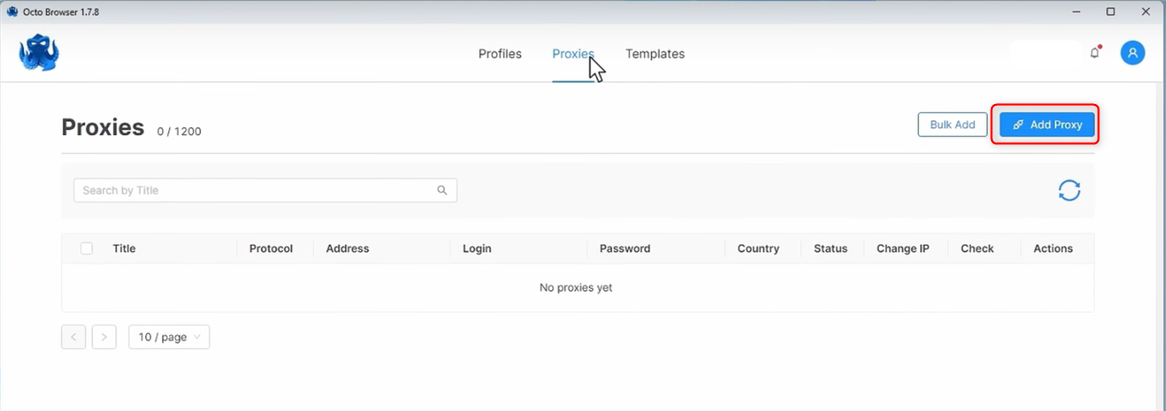
 Select **Add proxy**.
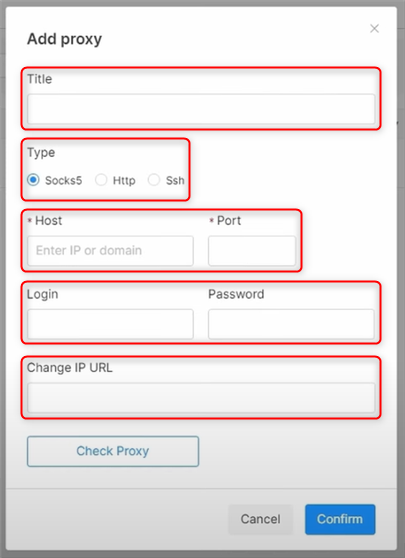
 In the pop-up window, fill in the required fields:
* **Title:** Name the proxy
* **Type:** HTTP/S or SOCKS5
* **Host:** `proxy.oculus-proxy.com`
* **Port:** Retrieve the port number from your [Oculus Dashboard](https://oculusproxies.com/dashboard/page/plans).
* **Login:** Enter your Oculus Proxy **username**.
* **Password:** Enter your Oculus Proxy **password**.
* **URL:** (Optional)
In the pop-up window, fill in the required fields:
* **Title:** Name the proxy
* **Type:** HTTP/S or SOCKS5
* **Host:** `proxy.oculus-proxy.com`
* **Port:** Retrieve the port number from your [Oculus Dashboard](https://oculusproxies.com/dashboard/page/plans).
* **Login:** Enter your Oculus Proxy **username**.
* **Password:** Enter your Oculus Proxy **password**.
* **URL:** (Optional)
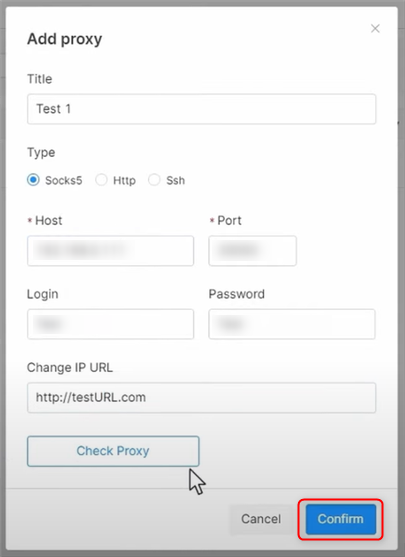
 Press **Confirm** to save the proxy settings.
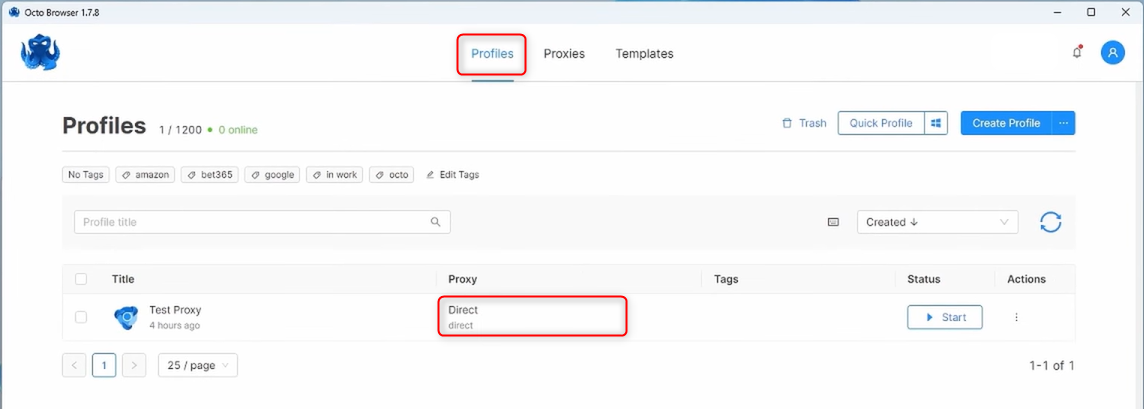
 Return to the **Profiles** tab and find the **direct** option in the proxy column.
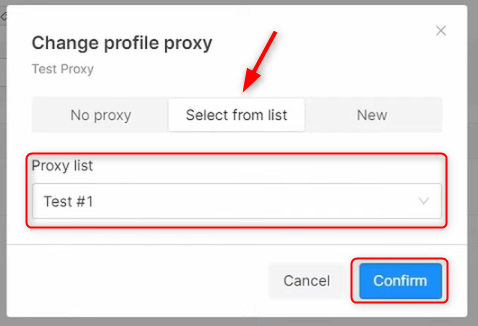
 Choose **Select from list**, pick the proxy you previously created, and click **Confirm**.
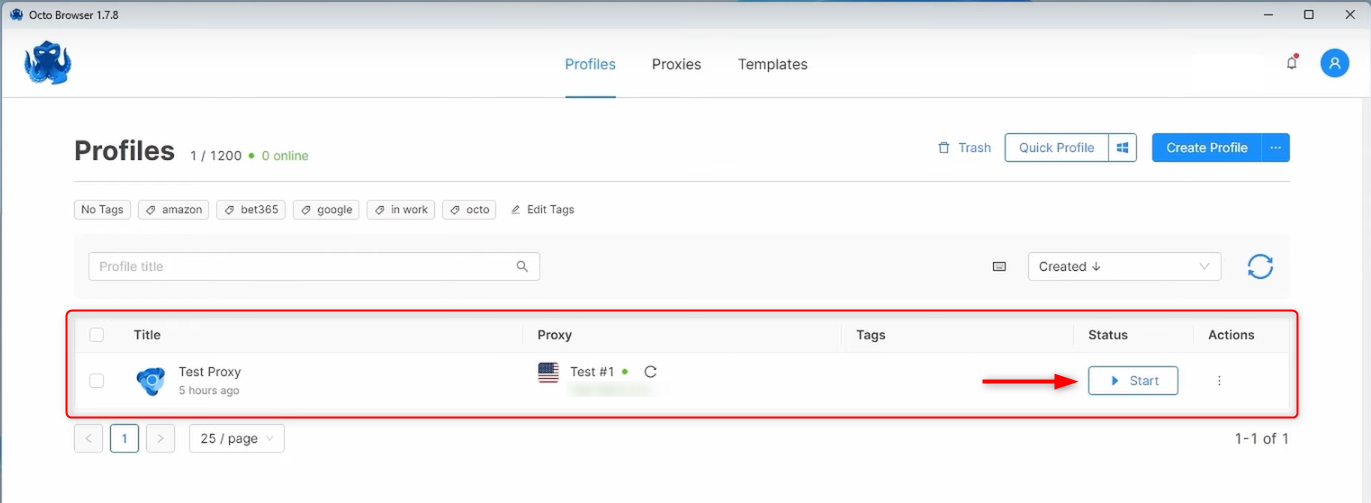
 When direct updates to the selected proxy, press **Start** to launch it.
 **You're all set!** You’ve successfully integrated **Oculus Proxies** with **Octo Browser**. Now you can securely manage multiple accounts, perform web scraping, or enhance your privacy while browsing.