> ## Documentation Index
> Fetch the complete documentation index at: https://docs.oculusproxies.com/llms.txt
> Use this file to discover all available pages before exploring further.
# How to Set Up Oculus Proxies With Shadowrocket
> Learn how to integrate Toolip with Shadowrocket for secure and seamless browsing on your mobile device. Follow this step-by-step guide to configure Toolip and enhance your online privacy.
 ## What is Shadowrocket?
**Shadowrocket** is a versatile mobile application that allows you to direct your internet traffic through proxy servers, including **Oculus Proxies**. It supports multiple proxy protocols such as HTTP, HTTPS, and SOCKS5. Known for its user-friendly interface and adaptability, Shadowrocket is a top choice for private browsing and managing data securely on the go.
If you're using **Oculus** to access search engines like **Google, Bing, or Yandex** and facing connection issues, the proxy type could be the reason. **ISP Premium Proxies** ensure stable and unrestricted access, preventing blocks that standard proxies might encounter. Switching to **ISP Premium Proxies** can help maintain smooth and reliable performance.
## How to Integrate Oculus Proxies With Shadowrocket
On android, shadowrocket supports only **SOCKS5**. This means you need to use port **31115** only!
[Download Shadowrocket](https://play.google.com/store/apps/details?id=com.v2cross.proxy\&gl=PT) app from playstore.
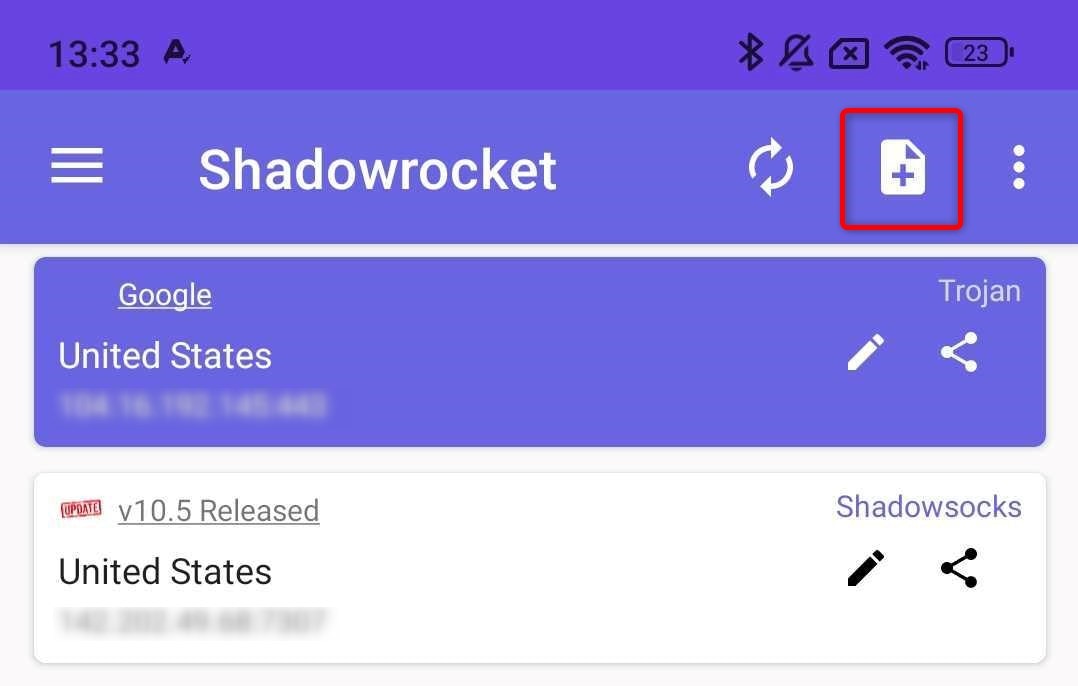
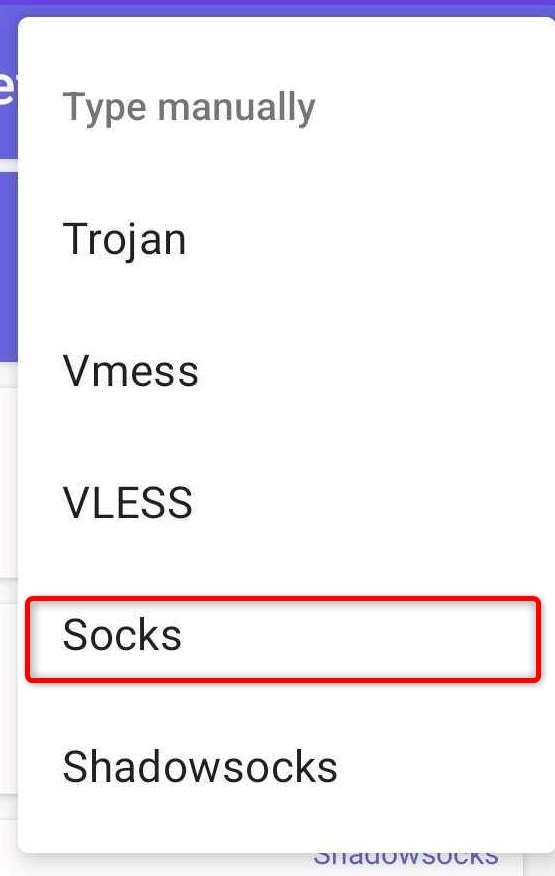
Once the app is launched, tap the **+** icon at the top to add a new proxy, then select **Socks** as the proxy type.
## What is Shadowrocket?
**Shadowrocket** is a versatile mobile application that allows you to direct your internet traffic through proxy servers, including **Oculus Proxies**. It supports multiple proxy protocols such as HTTP, HTTPS, and SOCKS5. Known for its user-friendly interface and adaptability, Shadowrocket is a top choice for private browsing and managing data securely on the go.
If you're using **Oculus** to access search engines like **Google, Bing, or Yandex** and facing connection issues, the proxy type could be the reason. **ISP Premium Proxies** ensure stable and unrestricted access, preventing blocks that standard proxies might encounter. Switching to **ISP Premium Proxies** can help maintain smooth and reliable performance.
## How to Integrate Oculus Proxies With Shadowrocket
On android, shadowrocket supports only **SOCKS5**. This means you need to use port **31115** only!
[Download Shadowrocket](https://play.google.com/store/apps/details?id=com.v2cross.proxy\&gl=PT) app from playstore.
Once the app is launched, tap the **+** icon at the top to add a new proxy, then select **Socks** as the proxy type.
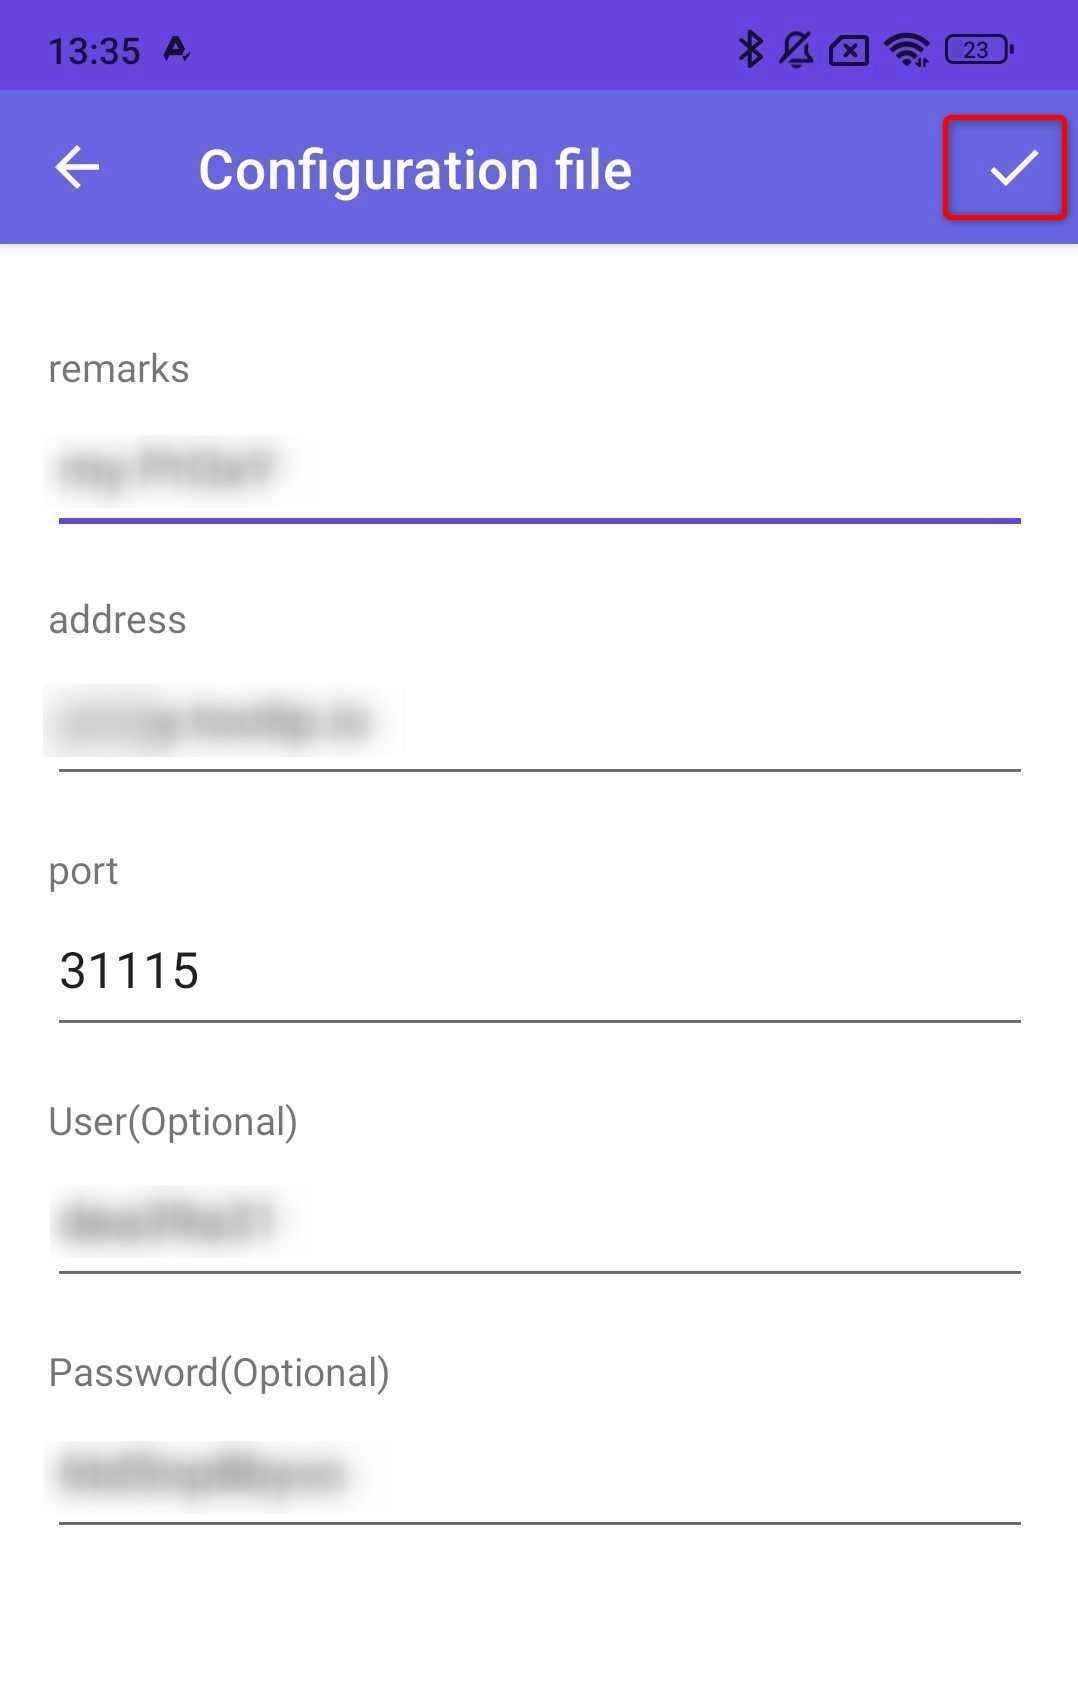
 Now fill the necessary information: `remarks(proxy name)`, `Address(Host)`, `Port(31115)`, `User` and `Password`, then hit **Save** to store the configuration.
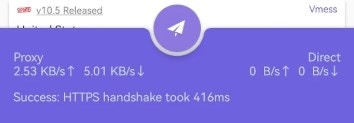
 To enable the proxy, simply press the **paper airplane icon** located at the bottom of the screen and you're good to go!
**And now you're all set-up**🚀.
To enable the proxy, simply press the **paper airplane icon** located at the bottom of the screen and you're good to go!
**And now you're all set-up**🚀.
 [Download Shadowrocket](https://apps.apple.com/us/app/shadowrocket/id932747118?platform=iphone) app from appstore.
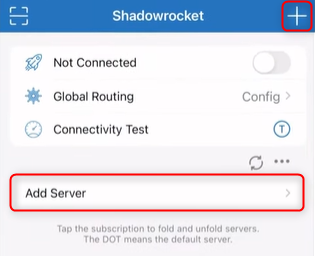
After installation, tap **Add Server**, or if proxies are already listed, use the **+** button at the top.
[Download Shadowrocket](https://apps.apple.com/us/app/shadowrocket/id932747118?platform=iphone) app from appstore.
After installation, tap **Add Server**, or if proxies are already listed, use the **+** button at the top.
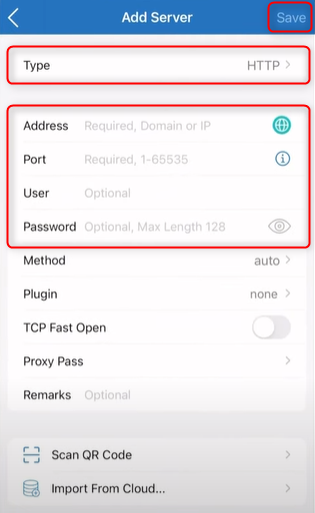
 On iOS, select your preferred proxy type and enter the required details: `Address(Host)`, `Port`, `User` and `Password`. Then hit **Save**.
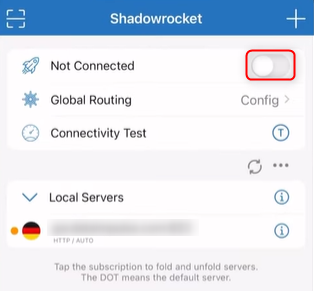
 Once added, toggle the switch to activate your proxy!
**And now you're all set-up**🚀.
Once added, toggle the switch to activate your proxy!
**And now you're all set-up**🚀.