> ## Documentation Index
> Fetch the complete documentation index at: https://docs.oculusproxies.com/llms.txt
> Use this file to discover all available pages before exploring further.
# How to Set Up Oculus Proxies With Shadowsocks
> Enhance your online privacy and bypass internet restrictions with Shadowsocks, a powerful and lightweight proxying tool. By integrating Shadowsocks, you can configure and manage a secure SOCKS5 proxy connection, allowing for unrestricted access to the web while maintaining high-speed performance.
 ## What is Shadowsocks?
**Shadowsocks** is an open-source proxy tool designed to bypass censorship and enhance online privacy. Unlike traditional VPNs, it operates as a secure **SOCKS5 proxy**, offering greater flexibility and speed while maintaining a lightweight footprint. Shadowsocks is particularly effective at evading deep packet inspection (DPI), making it a popular choice for users who need reliable access to restricted content. By using **Shadowsocks together with Oculus Proxies**, you can take full control of your internet connection, ensuring a seamless and private browsing experience.
If you're using **Oculus** to access search engines like **Google, Bing, or Yandex** and facing connection issues, the proxy type could be the reason. **ISP Premium Proxies** ensure stable and unrestricted access, preventing blocks that standard proxies might encounter. Switching to **ISP Premium Proxies** can help maintain smooth and reliable performance.
## How to Integrate Oculus Proxies With Shadowsocks
Get the latest **.zip** file from the official [Shadowsocks GitHub repository](https://github.com/shadowsocks/shadowsocks-windows/releases).
## What is Shadowsocks?
**Shadowsocks** is an open-source proxy tool designed to bypass censorship and enhance online privacy. Unlike traditional VPNs, it operates as a secure **SOCKS5 proxy**, offering greater flexibility and speed while maintaining a lightweight footprint. Shadowsocks is particularly effective at evading deep packet inspection (DPI), making it a popular choice for users who need reliable access to restricted content. By using **Shadowsocks together with Oculus Proxies**, you can take full control of your internet connection, ensuring a seamless and private browsing experience.
If you're using **Oculus** to access search engines like **Google, Bing, or Yandex** and facing connection issues, the proxy type could be the reason. **ISP Premium Proxies** ensure stable and unrestricted access, preventing blocks that standard proxies might encounter. Switching to **ISP Premium Proxies** can help maintain smooth and reliable performance.
## How to Integrate Oculus Proxies With Shadowsocks
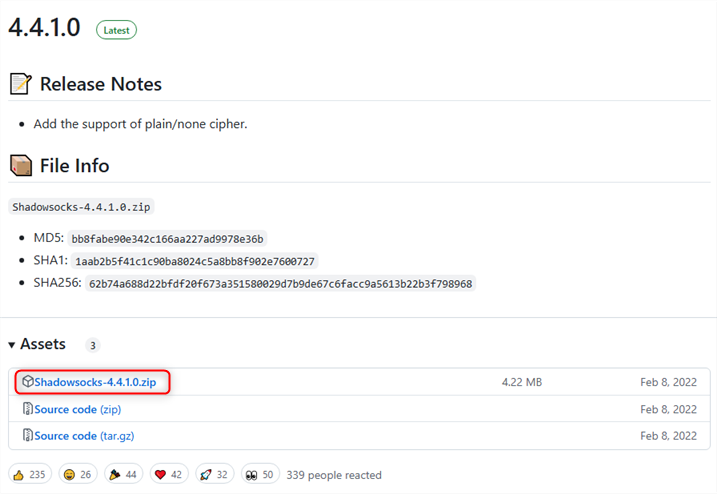
Get the latest **.zip** file from the official [Shadowsocks GitHub repository](https://github.com/shadowsocks/shadowsocks-windows/releases).
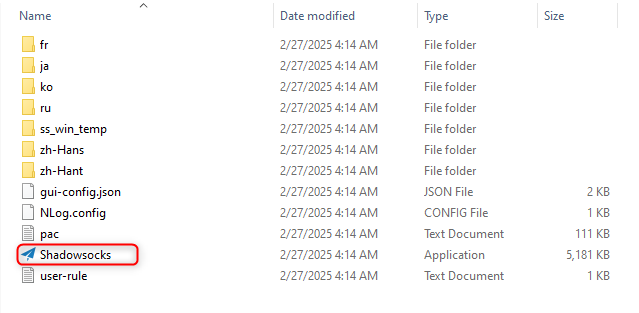
 Unzip the downloaded folder and open **Shadowsocks.exe**.
 In the application window, enter the `IP(Host)`, `Port`, and `Password` of your proxy server.
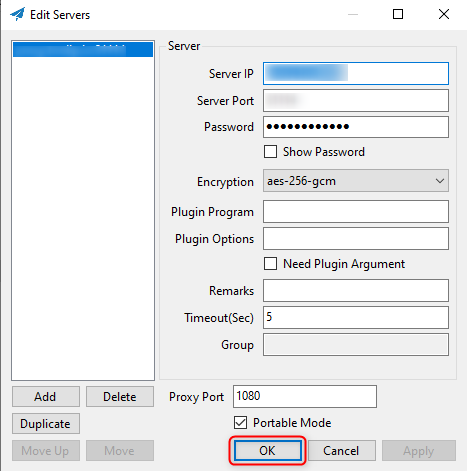
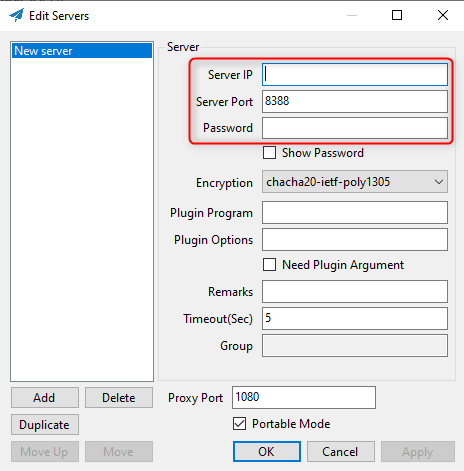 Click **Apply** and then **Save** to store your configuration.
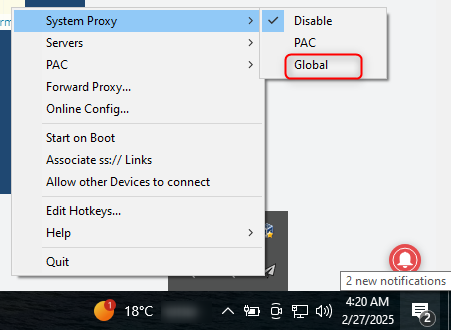
 Right-click the Shadowsocks tray icon, navigate to **System Proxy**, and select **Global** to activate the proxy. Your Shadowsocks proxy is now set up and running!
 First, [download and install](https://play.google.com/store/apps/details?id=com.github.shadowsocks\&hl=en) the Shadowsocks app from the Google Play Store.
Tap the **Pencil icon** in the top-right corner of the app’s main screen to open the server settings.
First, [download and install](https://play.google.com/store/apps/details?id=com.github.shadowsocks\&hl=en) the Shadowsocks app from the Google Play Store.
Tap the **Pencil icon** in the top-right corner of the app’s main screen to open the server settings.
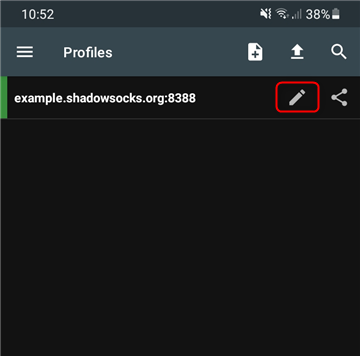 Enter the necessary details: Proxy `Host`, `Port`, and `Password`.
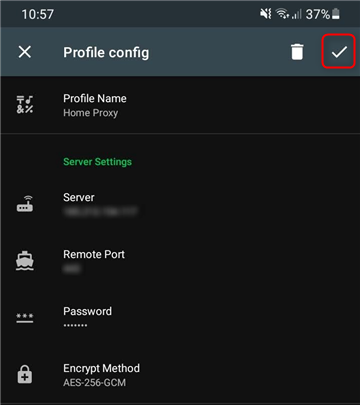
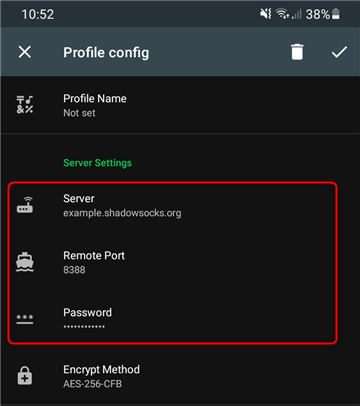 After entering all the details, **save** the profile to apply the settings.
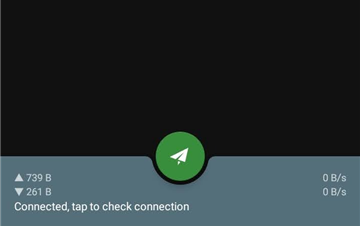
 On the main screen of the app, locate the gray button with the **paper plane icon** and press it to **enable the proxy** connection.
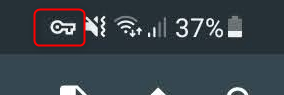
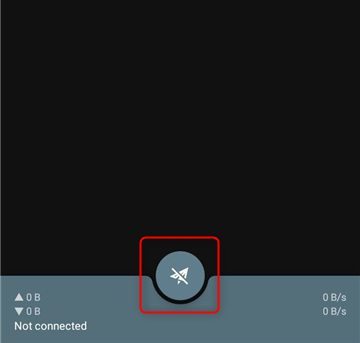 If the setup is successful, the paper plane icon will turn **green**, indicating that the proxy is active. Also, a **VPN icon** will appear in the status bar of your Android device, confirming the connection is established.