> ## Documentation Index
> Fetch the complete documentation index at: https://docs.oculusproxies.com/llms.txt
> Use this file to discover all available pages before exploring further.
# How to Use Oculus with ZennoPoster
> Simplify your automation with Oculus in ZennoPoster. This guide will walk you through setting up secure and seamless proxy connections for hassle-free web automation.
 ## What is ZennoPoster?
**ZennoPoster** is an automation tool that helps you perform repetitive online tasks effortlessly. Whether you're managing multiple accounts, scraping data, or automating web interactions, ZennoPoster allows you to create workflows without writing code. It features browser emulation, CAPTCHA solving, scheduling, and proxy support—making it a favorite among marketers, SEO experts, and developers.
By using **Oculus Proxies**, you can enhance your automation, protect your identity, and bypass website restrictions, ensuring a smoother experience.
If you’re using **Oculus** to access search engines like **Google, Bing, or Yandex** and facing connection issues, your proxy type may need adjustment. **ISP Premium Proxies** provide stable and unrestricted access, preventing blocks that standard proxies might encounter. Switching to **ISP Premium Proxies** can improve performance.
## How to Set Up Oculus With ZennoPoster
1\. [Download ZennoPoster](https://zennolab.com/en/products/zennoposter/) from the official website.
2\. Follow the installation instructions to complete the setup.
1\. Open ZennoPoster.
2\. Click **New Project** to start setting up your automation workflow.
## What is ZennoPoster?
**ZennoPoster** is an automation tool that helps you perform repetitive online tasks effortlessly. Whether you're managing multiple accounts, scraping data, or automating web interactions, ZennoPoster allows you to create workflows without writing code. It features browser emulation, CAPTCHA solving, scheduling, and proxy support—making it a favorite among marketers, SEO experts, and developers.
By using **Oculus Proxies**, you can enhance your automation, protect your identity, and bypass website restrictions, ensuring a smoother experience.
If you’re using **Oculus** to access search engines like **Google, Bing, or Yandex** and facing connection issues, your proxy type may need adjustment. **ISP Premium Proxies** provide stable and unrestricted access, preventing blocks that standard proxies might encounter. Switching to **ISP Premium Proxies** can improve performance.
## How to Set Up Oculus With ZennoPoster
1\. [Download ZennoPoster](https://zennolab.com/en/products/zennoposter/) from the official website.
2\. Follow the installation instructions to complete the setup.
1\. Open ZennoPoster.
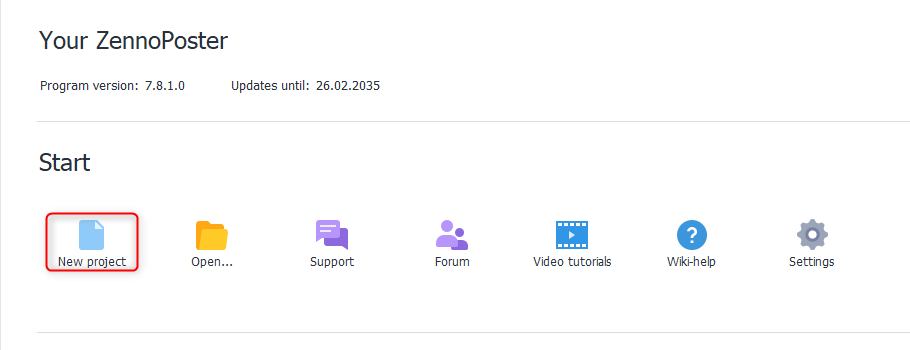
2\. Click **New Project** to start setting up your automation workflow.
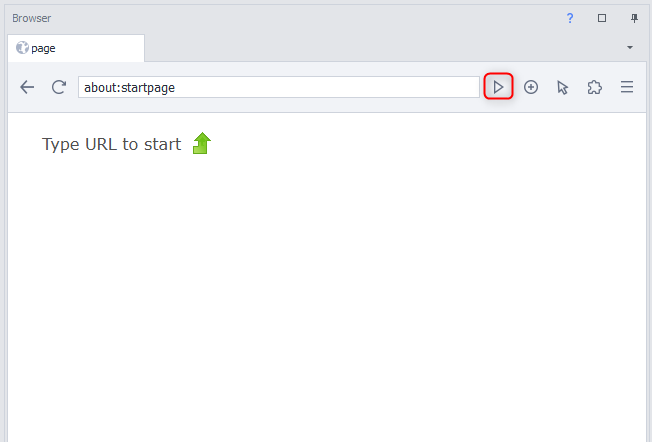
 1\. Locate the **Browser** section inside ZennoPoster.
2\. Click the **Play** button to open a new browser session.
1\. Locate the **Browser** section inside ZennoPoster.
2\. Click the **Play** button to open a new browser session.
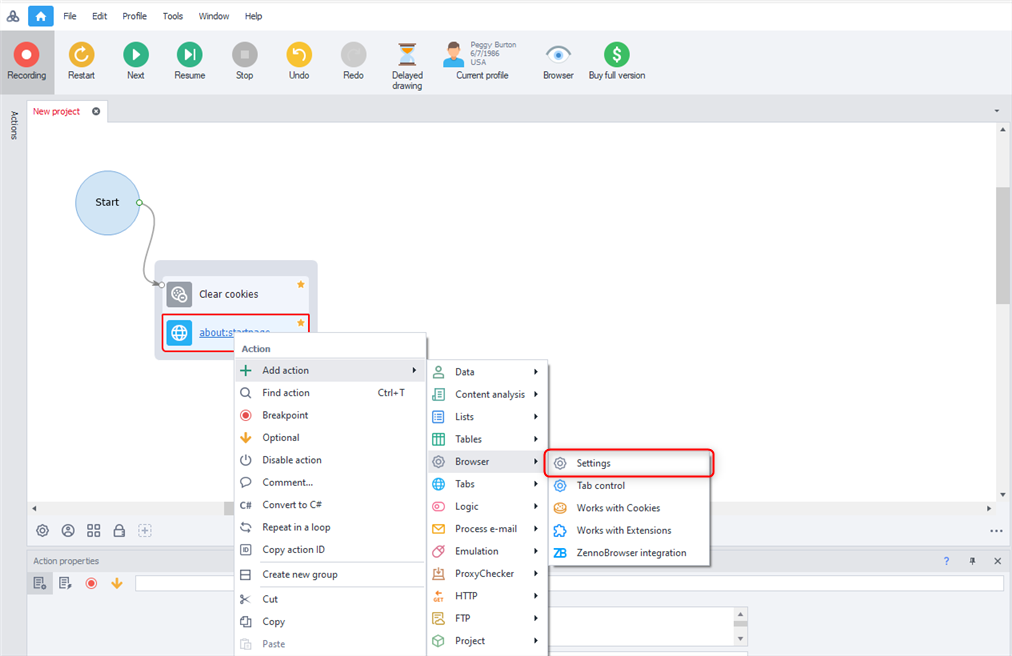
 1\. Right-click inside the workflow area.
2\. Select **Add Action** from the menu.
3\. Navigate to **Browser** > **Settings**.
1\. Right-click inside the workflow area.
2\. Select **Add Action** from the menu.
3\. Navigate to **Browser** > **Settings**.
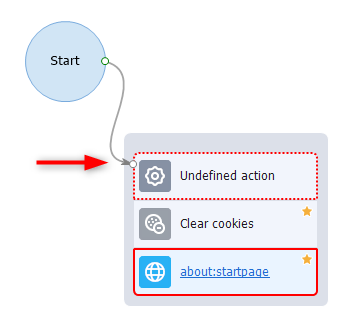
 1\. If the **Undefined Action Box** appears outside the workflow, drag it into position.
2\. Make sure the **Start** action is connected to your newly added action.
1\. If the **Undefined Action Box** appears outside the workflow, drag it into position.
2\. Make sure the **Start** action is connected to your newly added action.
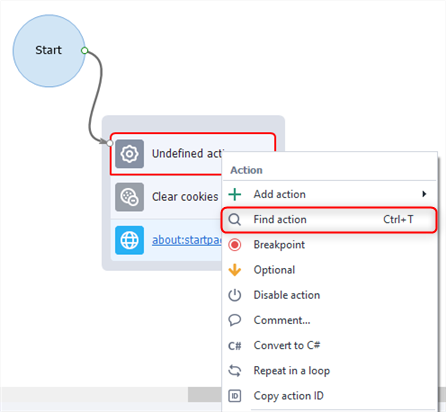
 1\. Right-click inside the ZennoPoster workspace.
2\. Select **Find Action**.
1\. Right-click inside the ZennoPoster workspace.
2\. Select **Find Action**.
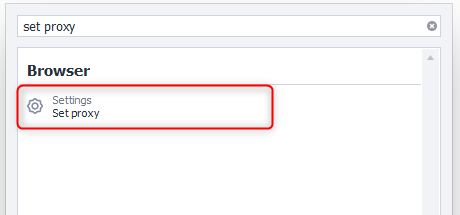
 1\. In the search bar, type **Set Proxy**.
2\. Click on the **Set Proxy** action to add it to your workflow.
1\. In the search bar, type **Set Proxy**.
2\. Click on the **Set Proxy** action to add it to your workflow.
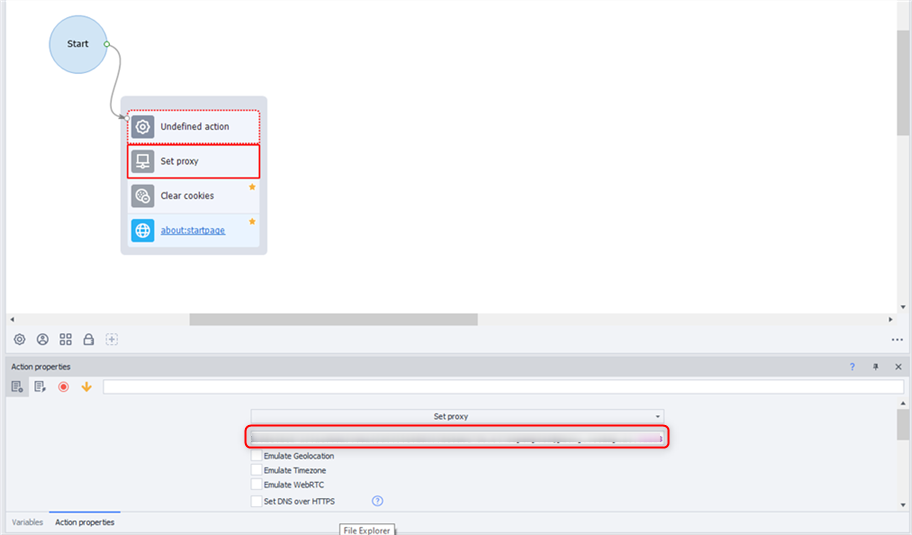
 1\. Find the **Proxy Settings** section at the bottom.
2\. Enter your Oculus proxy credentials in this format:\
`username:password@proxy.oculus-proxy.com:port`.
3\. Click **Apply** to save the changes.
1\. Find the **Proxy Settings** section at the bottom.
2\. Enter your Oculus proxy credentials in this format:\
`username:password@proxy.oculus-proxy.com:port`.
3\. Click **Apply** to save the changes.
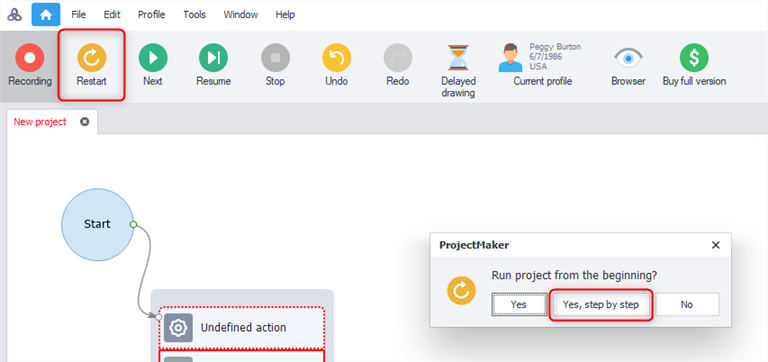
 1\. Click **Restart** at the top of the screen.
2\. In the pop-up window, select **Yes, step by step** to confirm the changes.
1\. Click **Restart** at the top of the screen.
2\. In the pop-up window, select **Yes, step by step** to confirm the changes.
 ## You're All Set!
Congratulations! You've successfully configured **Oculus Proxies** in **ZennoPoster**. Now, your automated tasks will run smoothly while staying anonymous and bypassing restrictions. Whether you're handling SEO, managing multiple accounts, or scraping data, this setup ensures a secure and efficient workflow. 🚀
## You're All Set!
Congratulations! You've successfully configured **Oculus Proxies** in **ZennoPoster**. Now, your automated tasks will run smoothly while staying anonymous and bypassing restrictions. Whether you're handling SEO, managing multiple accounts, or scraping data, this setup ensures a secure and efficient workflow. 🚀