
What is Geelark?
Geelark is a powerful browser profile management tool designed for privacy-focused users and professionals. It allows you to create isolated browsing environments, manage multiple online accounts, and customize profiles to suit your needs. By integrating Oculus Proxies, you can enhance Geelark’s capabilities, ensuring anonymity and smooth access to restricted or region-specific resources.How to Integrate Oculus Proxies With Geelark
1
Create and Configure a New Profile
1. Open the Geelark Dashboard and click New Profile.2. Assign a Profile Name and select the operating system for the profile.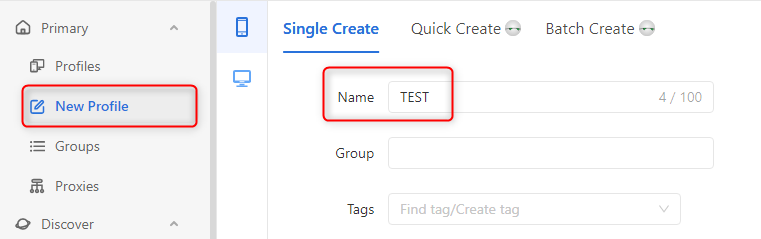
2
Configure Proxy Settings
1. In the Proxy Settings section, choose Custom.2. Select the Proxy Type (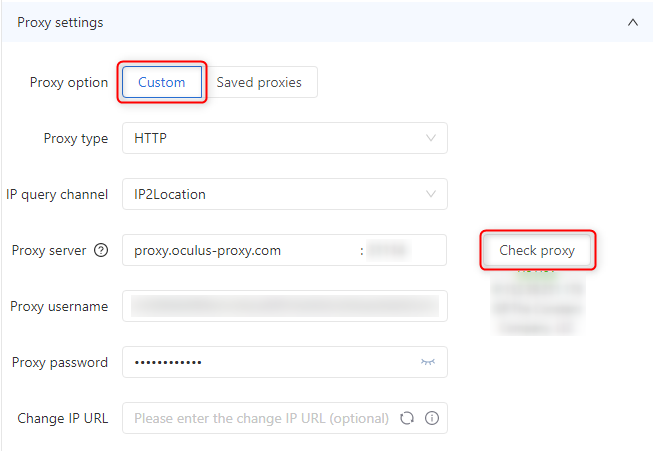
HTTP, HTTPS, or SOCKS5) based on your Oculus Proxy configuration.3. Enter your Oculus Proxy credentials:-
Proxy Server:
proxy.oculus-proxy.com - Port: Use the port number from your Oculus Dashboard.
- Username: Your Oculus Proxy username.
- Password: Your Oculus Proxy password.
3
Save and Launch the Profile
1. Click OK to save the profile settings.2. Locate the newly created profile on the Geelark Dashboard and click Start to launch it.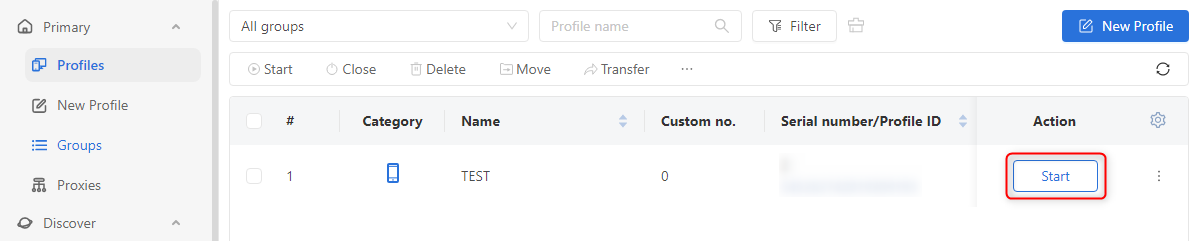
4
Verify Your Proxy Connection
1. Inside the Geelark profile, open a web browser.2. Go to httpbin.org/ip to check your IP address.3. Ensure the displayed IP matches your Oculus Proxy, confirming the successful configuration.